This article explains how to customize the purchase order PDF that is generated by Raley PO.
By default, Raley PO will generate a purchase order PDF when the purchase request is transitioned to the state APPROVED or a user with FINANCE permission makes a modification to approved purchase order number.
Raley is relying on PDF generator from HTML with value placeholders expressed in Thymeleaf templating language. Below you can find the default order template as well as example of a PDF that was generated from it:
Most likely, you'd want to make some adjustments to this template to conform with your organization's requirements. The good news is that you can make ANY kind of modification to the
purchase order template!
Just log in as a user who has COMPANY ADMIN permission, choose Apps→ Raley Purchase Orders in your Jira top menu and then navigate to tab Company.
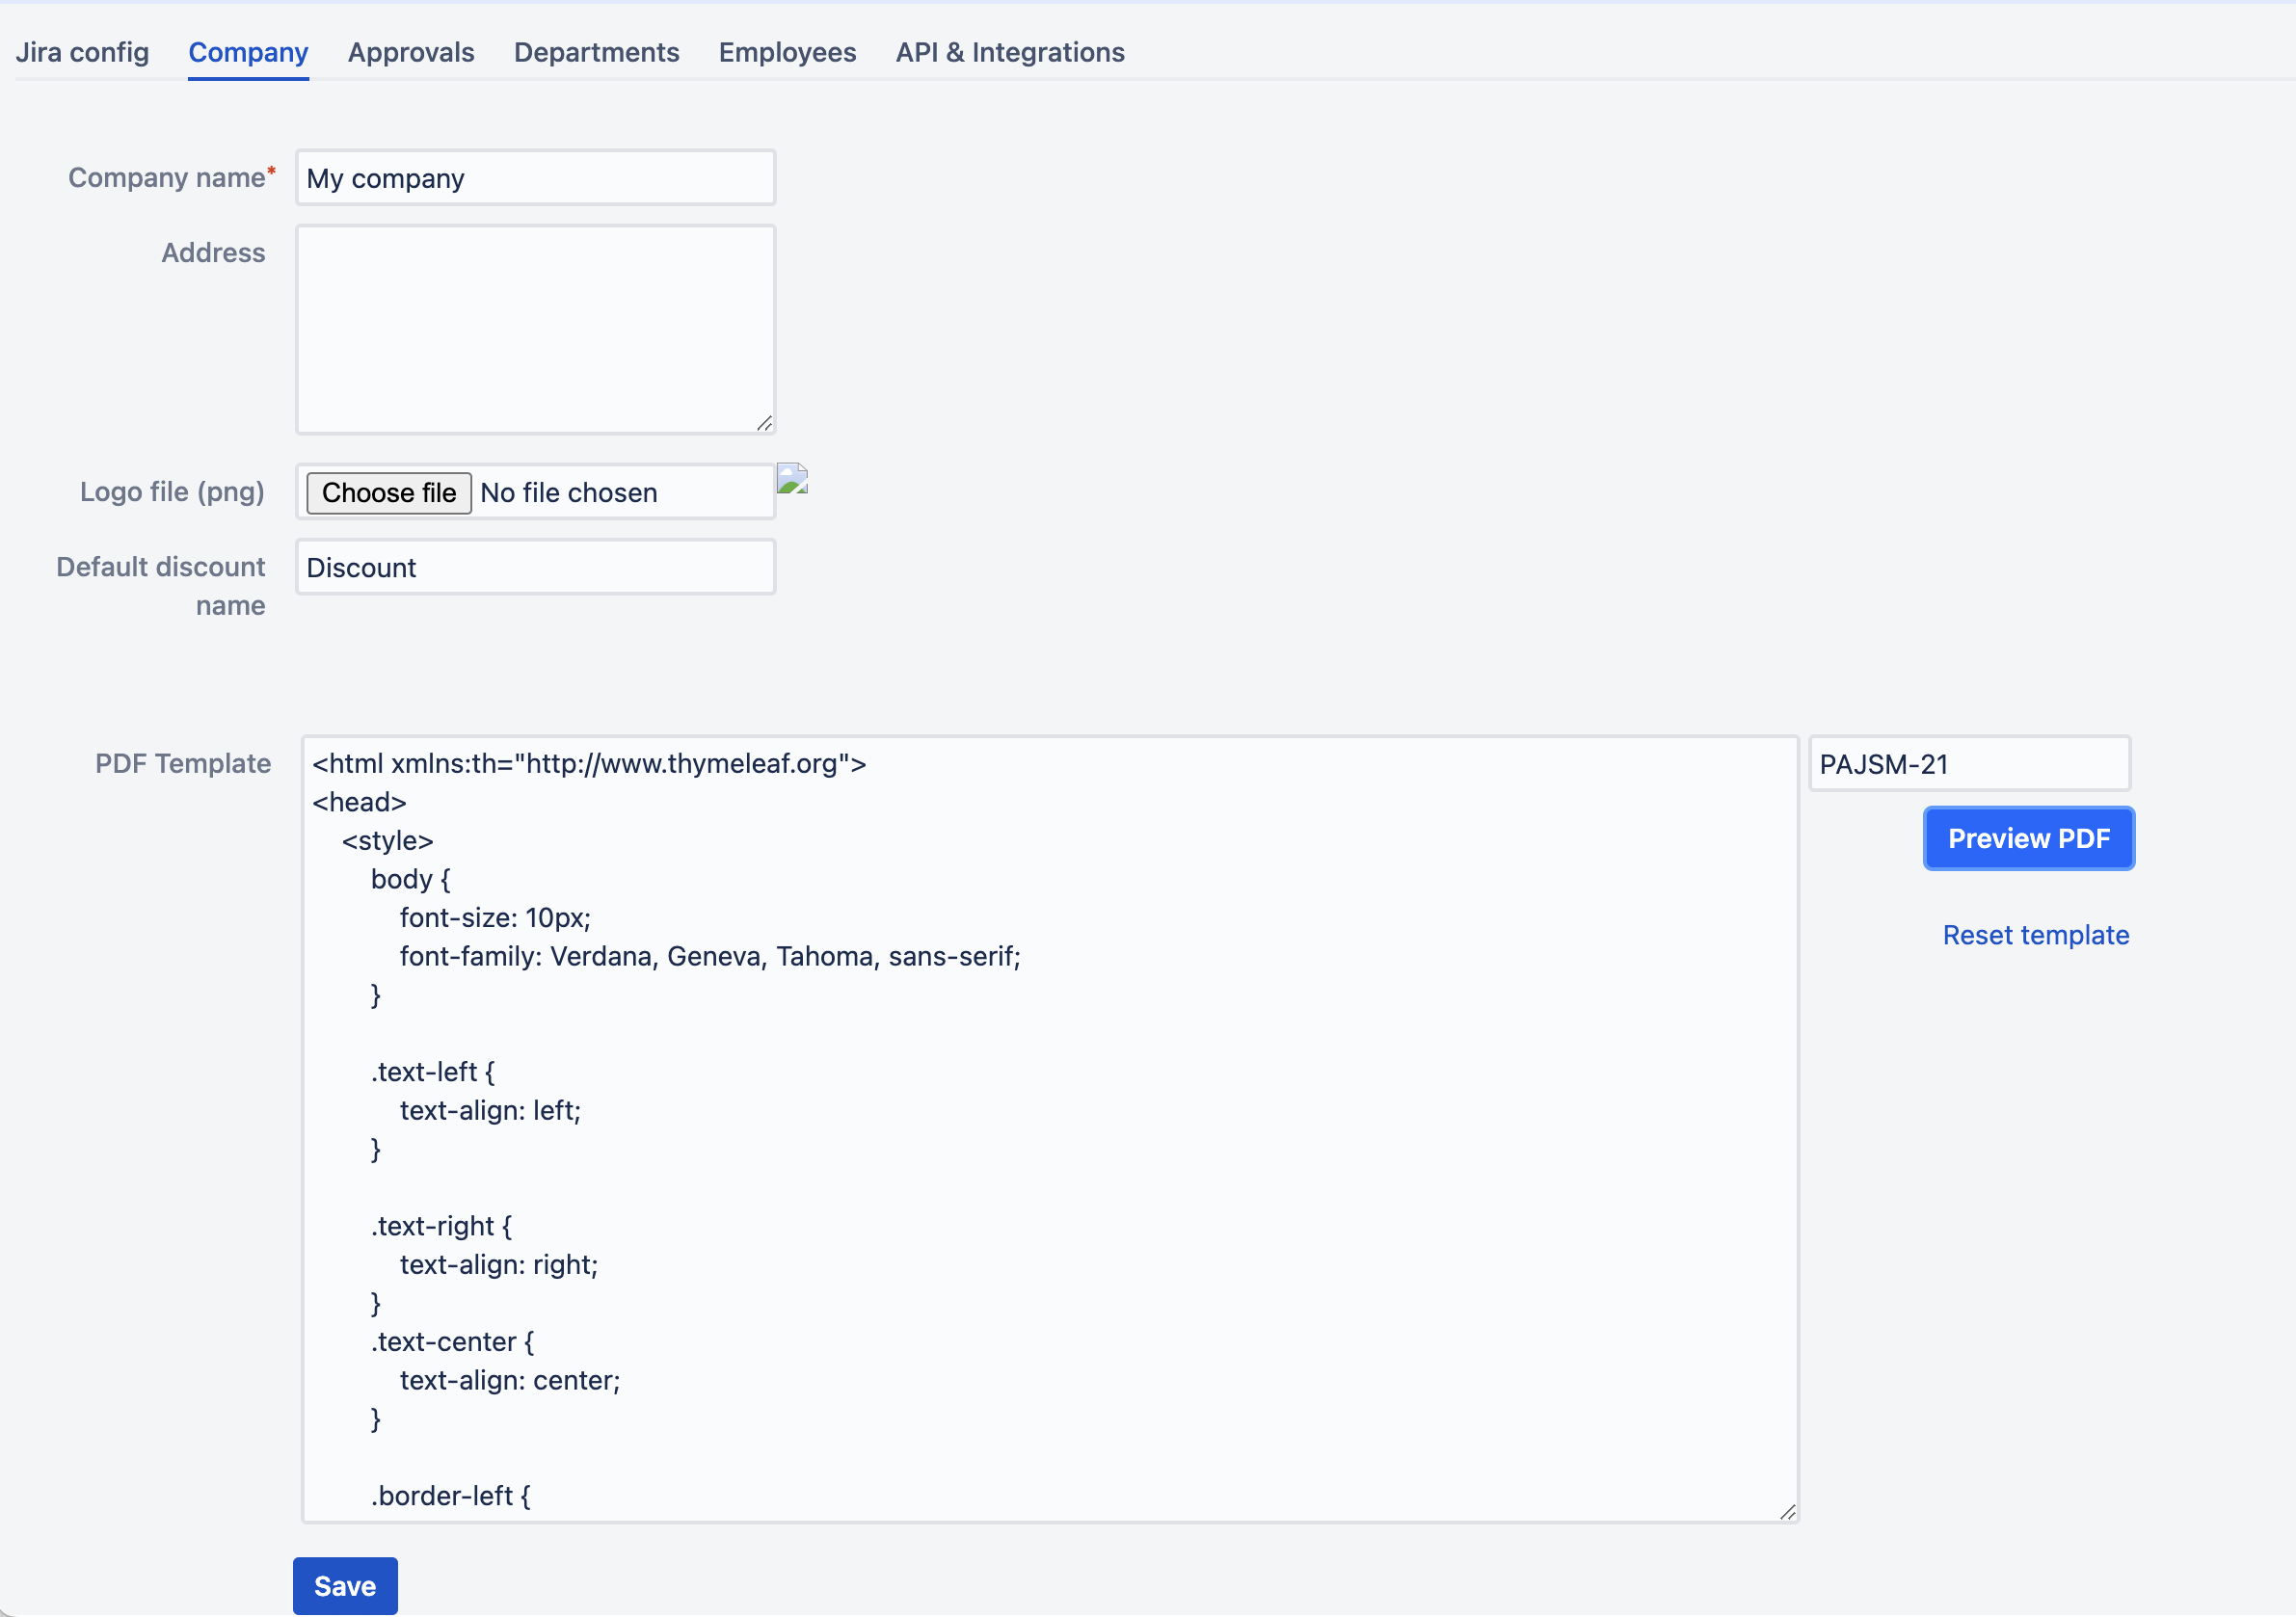
Note the large textarea in the bottom part of the screen called "PDF Template". This is where you make your template modifications and later on test it using Preview PDF button.
Just make the changes in the PDF Template as you need, provide a Jira issue key that keeps a purchase request (the status doesn't matter) and click on Preview PDF.
The system will generate a purchase order PDF file and opens it in your browser.
If you really screw it up, then you can always click on "Reset template" link and it will revert the PDF Template to the default.
NB! If you simply want to cancel your modifications to the template and return to the previous version that you were using then just refresh your browser.
NB! Note, that your changes to the template will not have effect on the way PDF is generated before you hit the button SAVE.
The following table shows all available properties of a Raley purchase order that you can reference in your template:
Purchase Order template variables
| Property | Description |
|---|---|
${logo} | path to your company logo as added on Company tab |
${number} | Purchase order number |
${date} | The date when this PDF was generated in format yyyy-MM-dd |
| ${order} | Purchase order object |
| ${order.jiraIssueKey} | Issue key of the purchase order |
| ${order.netAmount} | order net amount as java.math.BigDecimal |
| ${order.taxAmount} | order tax amount as java.math.BigDecimal |
| ${order.grossAmount} | order gross amount as java.math.BigDecimal |
| ${order.supplier} | Purchase order supplier object |
| ${order.supplier.PROPERTY} | The following properties are available in order.supplier: id, name, phone, email, address, notes, paymentDetails, taxNo, contact, terms |
| ${order.department} | Purchase order department object |
| ${order.department.PROPERTY} | The following properties are available in order.department: id, name, contactPerson, phone, email, address, taxNo |
| ${order.purchaseOrderLine} | java.util.List of objects. Every object is representing a separate purchase order line |
| ${purchaseOrderLine.unitPrice} | order line unit price as java.math.BigDecimal |
| ${purchaseOrderLine.quantity} | order line quantity as java.math.BigDecimal |
| ${purchaseOrderLine.total} | line total as java.math.BigDecimal |
| ${purchaseOrderLine.taxRate.PROPERTY} | tax rate that applies for this purchase order line. You can access these properties:
|
| ${purchaseOrderLine.product.PROPERTY} | product referenced in this order line. You can access these properties:
|
| ${order.discountName} | Name of the discount as used in this purchase order |
| ${order.discount} | value of discount as java.math.BigDecimal |
| ${companyAddress} | Company address as specified in Company tab |
| ${currencyCode} | 3-letter currency code as specified for your company |
| ${numDecimals} | How many decimals should be used when rendering amounts. By default, 2. If you need a different precision, then contact us via helpdesk |
| ${createdByName} | User's displayName who created this purchase request ticket in Jira |
| ${approverNames} | Comma-separated list of users' displayNames who are approvers of this purchase order |
| ${notes} | Issue description field |
| ${notesHTML} | Rich text issue description. Please note, that you'll need to use th:utext attribute to properly render it. For example: <div th:utext="'Notes ' + ${notesHTML}" style="width: 100%; border: solid 1px gray;"></div> |
| ${contactPerson} | Convenience field. If user has specified a custom contact person name for this purchase order then it will contain the specified value. Otherwise, it will contain the value of Contact person from Department to which this PO belongs. |
| ${address} | Convenience field. If user has specified a custom address for this purchase order then it will contain the specified value. Otherwise, it will contain the value of Address from Department that owns this PO. |
Once you're satisfied with the result, click on SAVE button below and from now on your order PDFs will be generated as you've specified in your template.
Adding a scripted-font name signature
You can add a scripted font signature into PDF generated by Raley. Below is an example of such a signature:

To create such a signature, you can use the following template fragment:
<tr>
        <td>Requested by</td>
        <td><span style="font-family: 'Brush Script MT', cursive;" th:text="${createdByName}"></span></td>
        <td colspan="2"></td>
</td>
Show values from order-line custom fields
To show the values from all custom fields of your purchase order line you can use the following code fragment (line 2):
<td class="text-left" th:text="${orderline.product.description}"></td>
<td class="text-left" th:each="cfI,index : ${orderline.customFieldsDto}" th:text="${cfI.value}" th:class="${index.count % 2 > 0}? 'odd'"></td>
Our you can show individual fields, using this technique (lines 2 and 3):
<td class="text-left" th:text="${orderline.product.description}"></td>
<td class="text-left" th:text="${orderline.customfield_1}"></td>
<td class="text-left" th:text="${orderline.customfield_3}"></td>
In the example above, we're outputting the values for GL code (customfield_1) and URL link (customfield_3)
Showing values from Jira standard and custom fields
You can also render the value of any Jira standard or custom field from the current ticket. Here's the example how to show summary of the ticket:
<div th:text="${jiraFieldHeaders['summary']} + ' ' + ${jiraFieldValues['summary']}" style="width: 100%; height: 40px; border: solid 1px gray;"></div>
And this is how you can show a custom field - both, name and the value:
<div th:text="${jiraFieldHeaders['customfield_10057']} + ' ' + ${jiraFieldValues['customfield_10057']}" style="width: 100%; height: 40px; border: solid 1px gray;"></div>
