This tutorial is aimed at users in your Jira who will be creating Purchase requests and send them for approvals. To create and modify purchase requests you need to have a Team Member role in Raley PO.
We assume that:
a) All your Purchase Orders will be living in Jira project called Purchase Orders for My Company (POFMC)
b) All Purchase orders are represented by Jira issues of type Purchase Order
In your own Jira environment, most likely, those will be different. Please contact your Jira administrator to figure out what is the correct Project name and Issue type that you should use for creating Purchase Orders in Raley.
To create a new purchase order simply create a new Jira ticket of type Purchase Order in project POFMC. Assign it a summary that's meaningful for you and then open the ticket you've just created again. If you cannot see Raley Purchase Order issue content, then open it as demonstrated on the screenshot below:
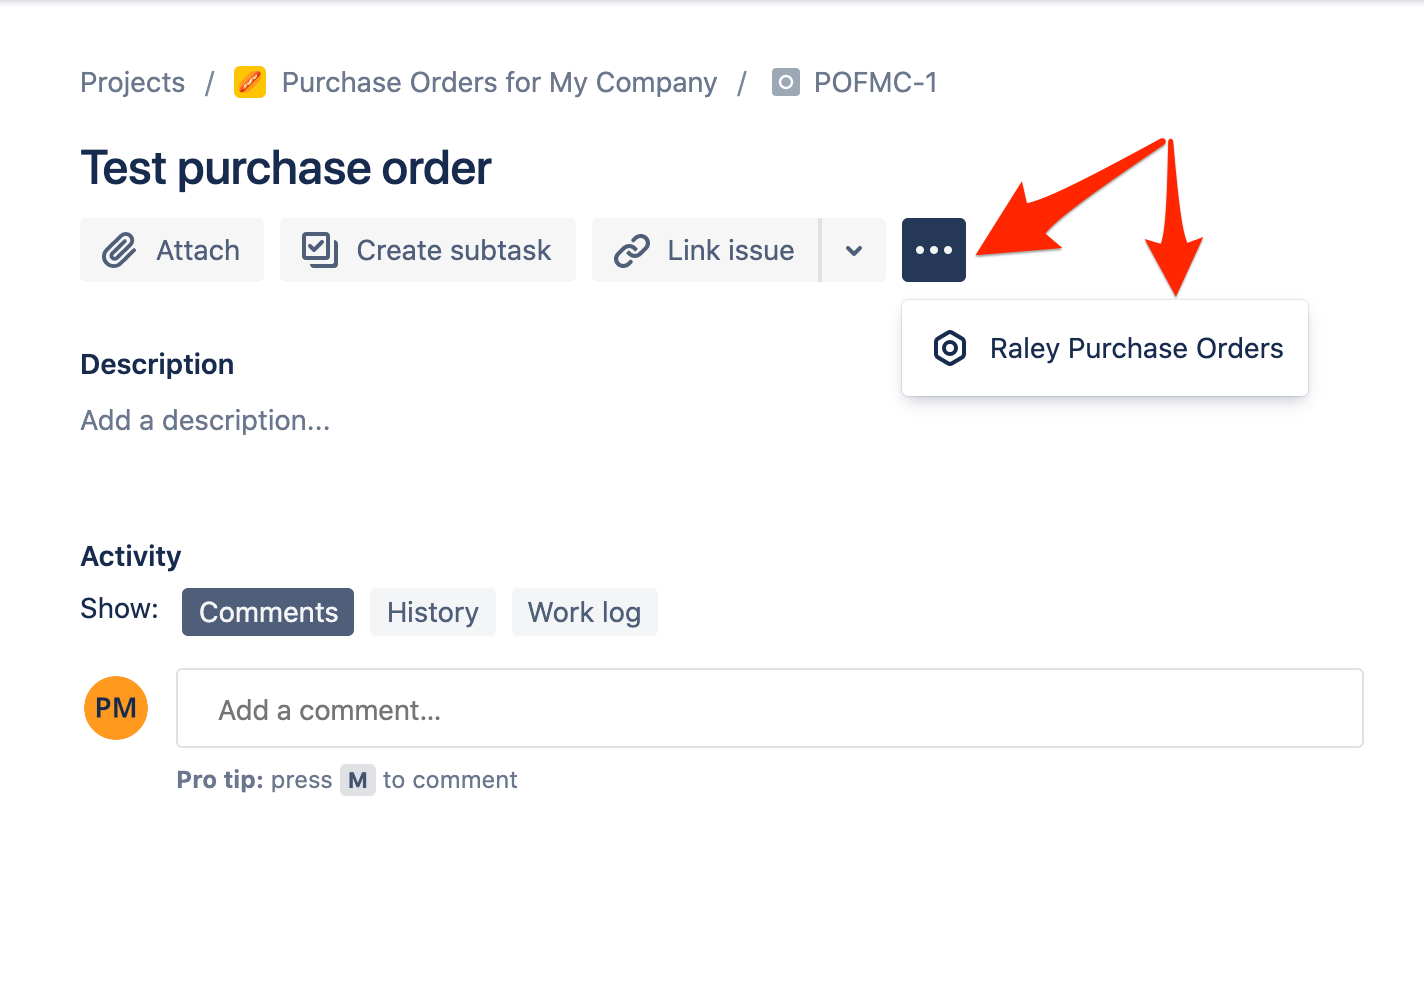
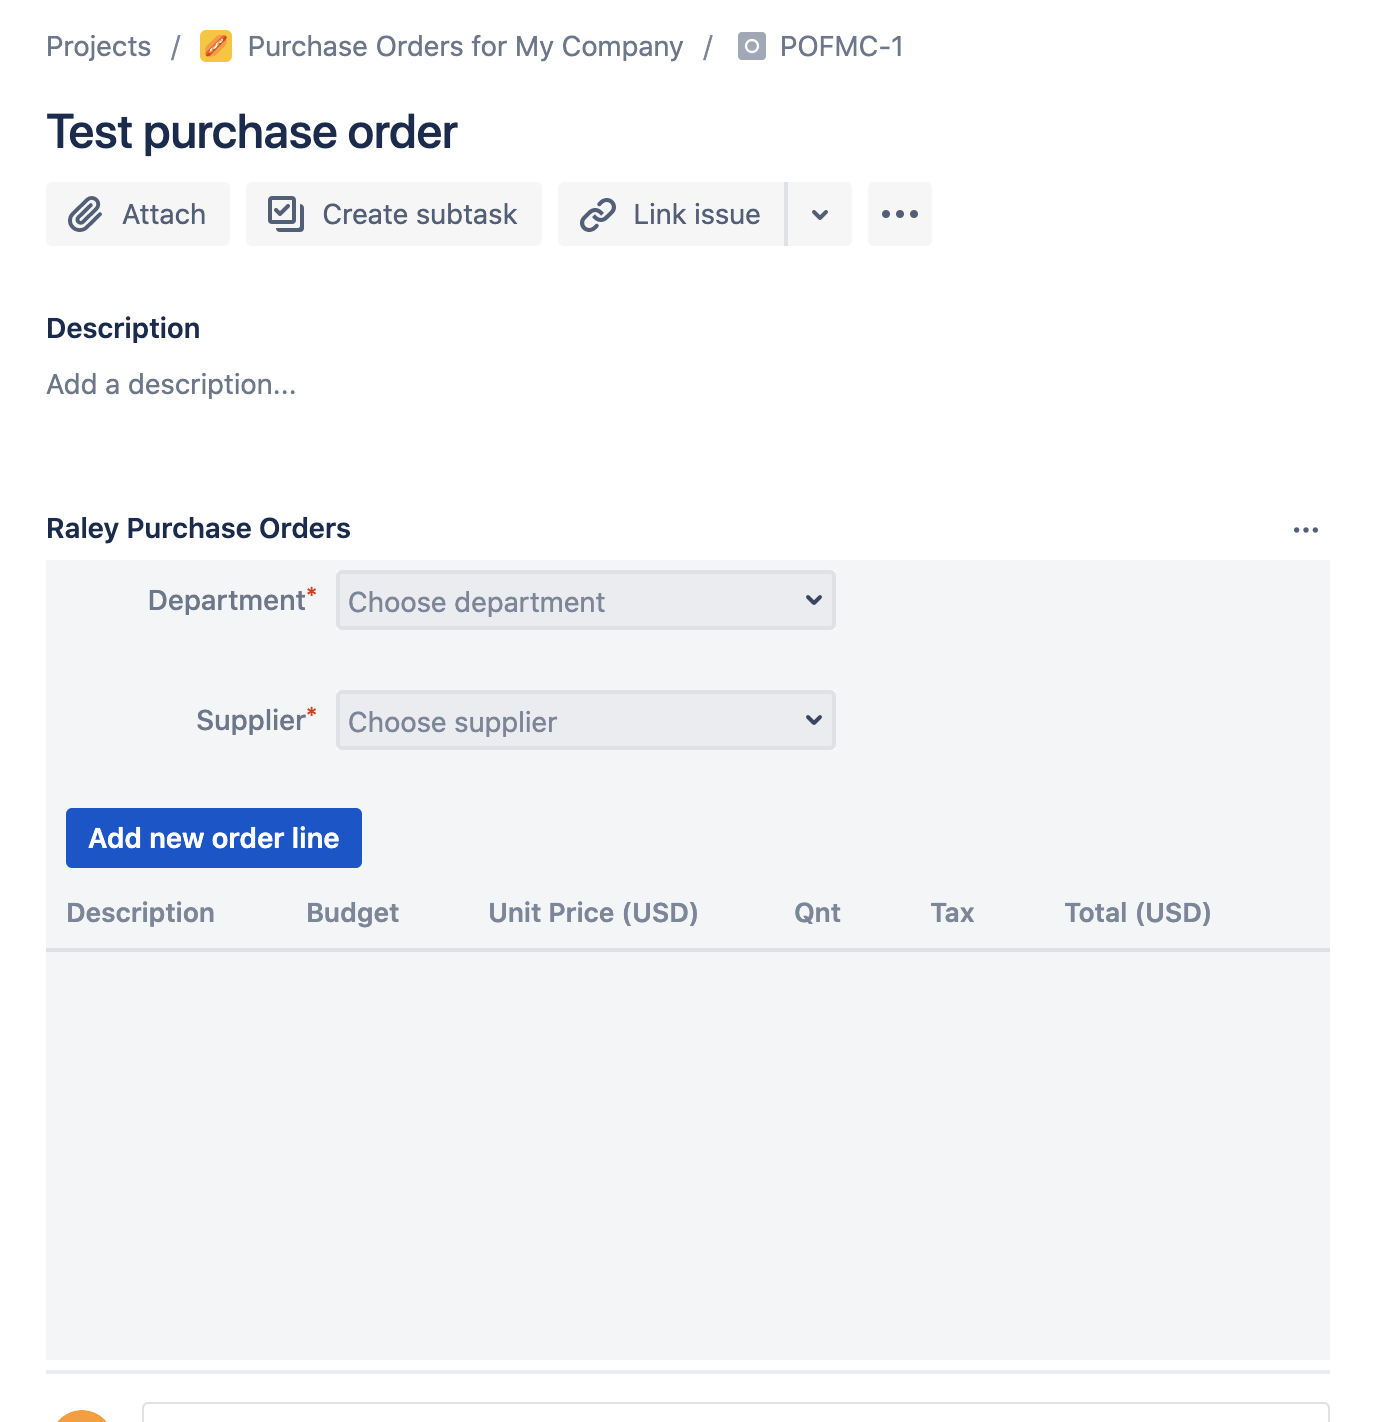
Your issue screen should now look like the following:
If you see a screen like the one below:
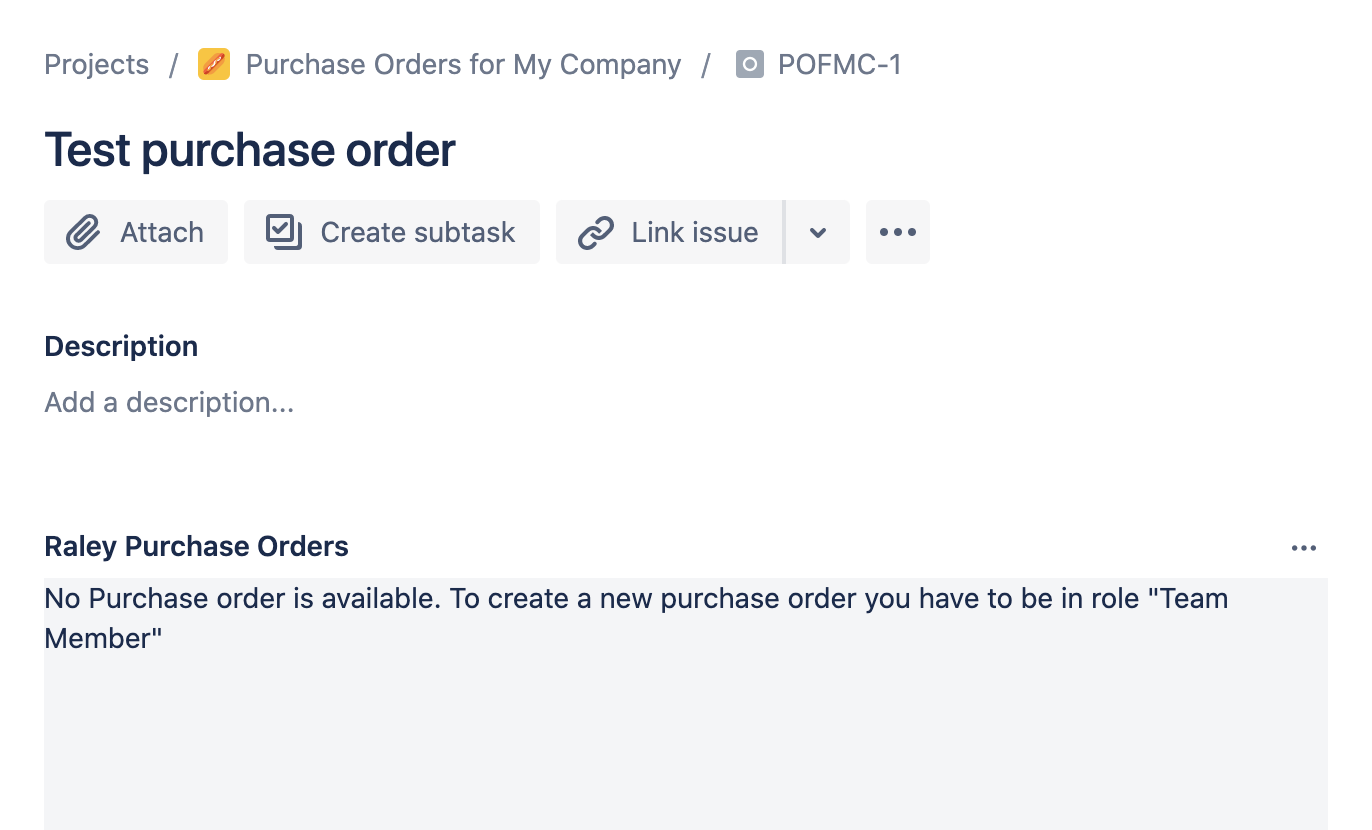
then you should ask your Jira administrator to add you to a Raley Purchase Orders Team Member role.
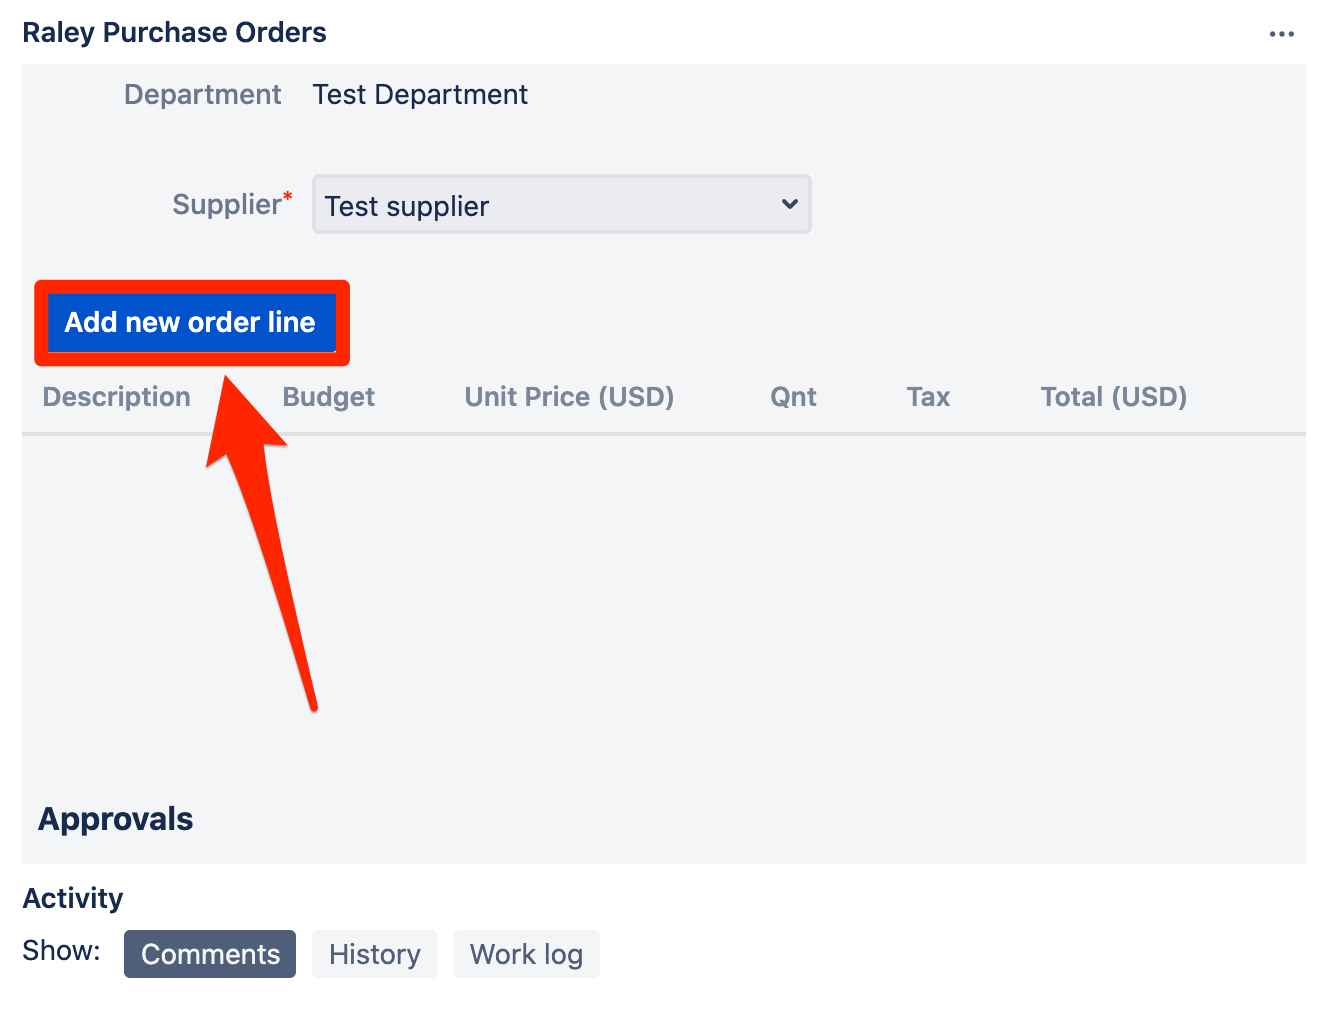
If a Team Member is connected with several departments, then he or she should choose the department in Department combo-box to which this Purchase Order will be connected. If there's exactly one department then it will be pre-populated. Same applies to Suppliers - if there's more than one Supplier is configured then you need to choose one of them, otherwise a single supplier will be selected.
When you have your Department and Supplier in place, click on the Add new order line button to create an order line in your purchase order:
The Add new order line popup window will appear inviting you to provide data for a new order line. You either use products already configured for Test supplier or add new ones. When you type, the Raley PO will try to autosuggest you existing products for currently chosen supplier:
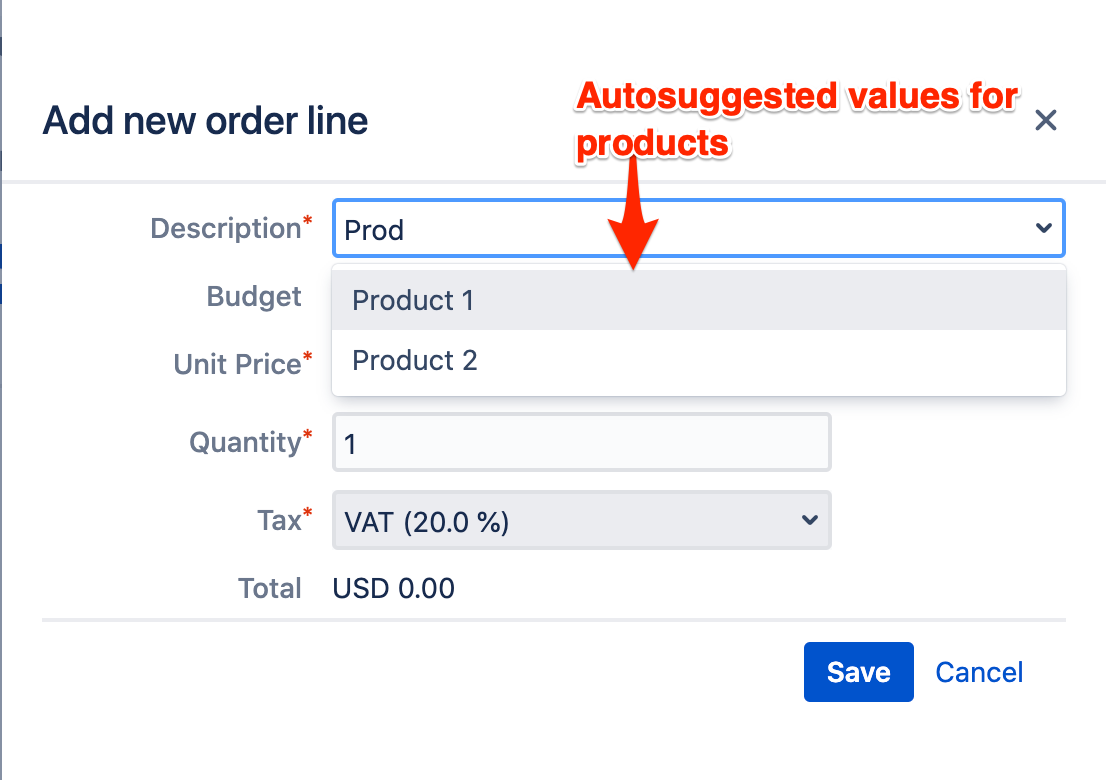
If you click on one of the autosuggested product then system will use Unit price and Tax values configured for it to pre-populate your order line form. By default, quantity value 1 will be used.
You can either accept them or correct as you like. The correction of Unit price or Tax will not affect the configured Unit price and Tax in Product registry.
If you choose to provide a description which cannot be matched against an existing product, then the system will request you to provide a valid Unit price. By default quantity value 1 and default tax will be applied. The example below illustrates the case when you add a new order line with a product that does not exist yet in products registry:
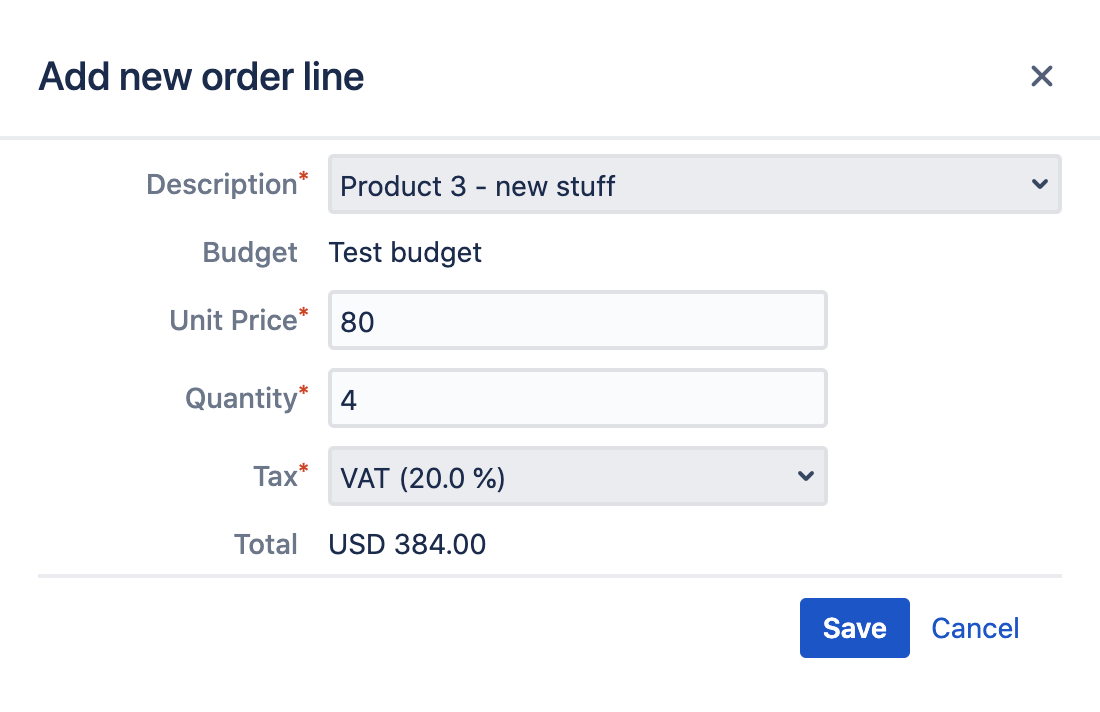
Note, that the Unit Price here is Net price to which specific Tax will apply. After clicking on Save button, the new order line will be added to both, the current Purchase Order as well as to Products registry of supplier Test supplier.
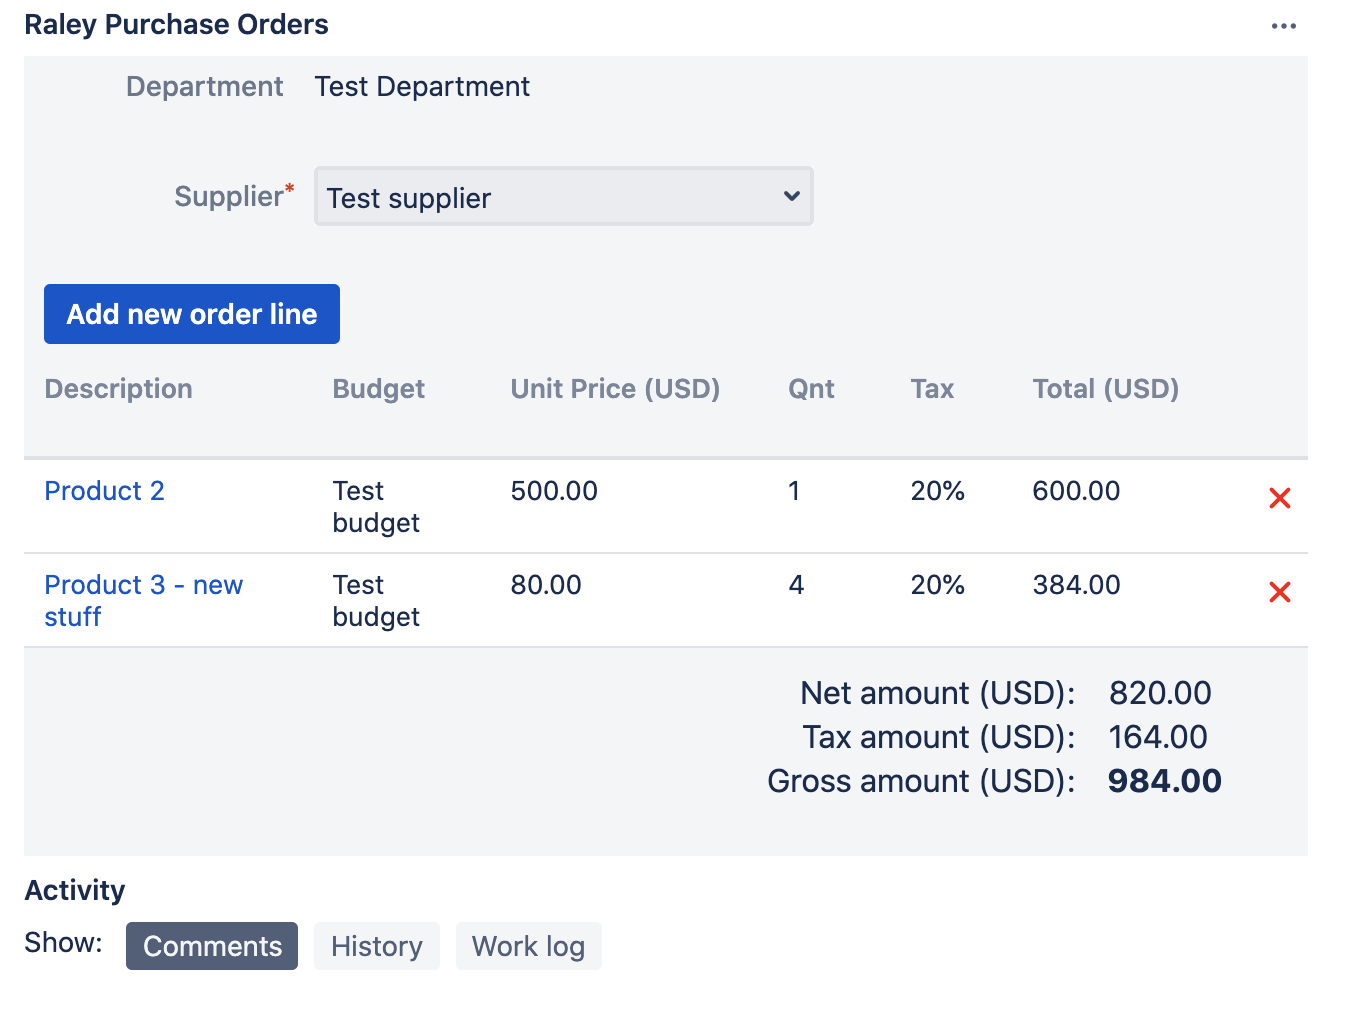
On the screenshot below you can see a Purchase Order with 2 order lines and the summary which shows Net amount, Tax amount and Order total (Gross amount).
Scroll down the Purchase Order frame and you'll see Approvals section which currently looks like this:
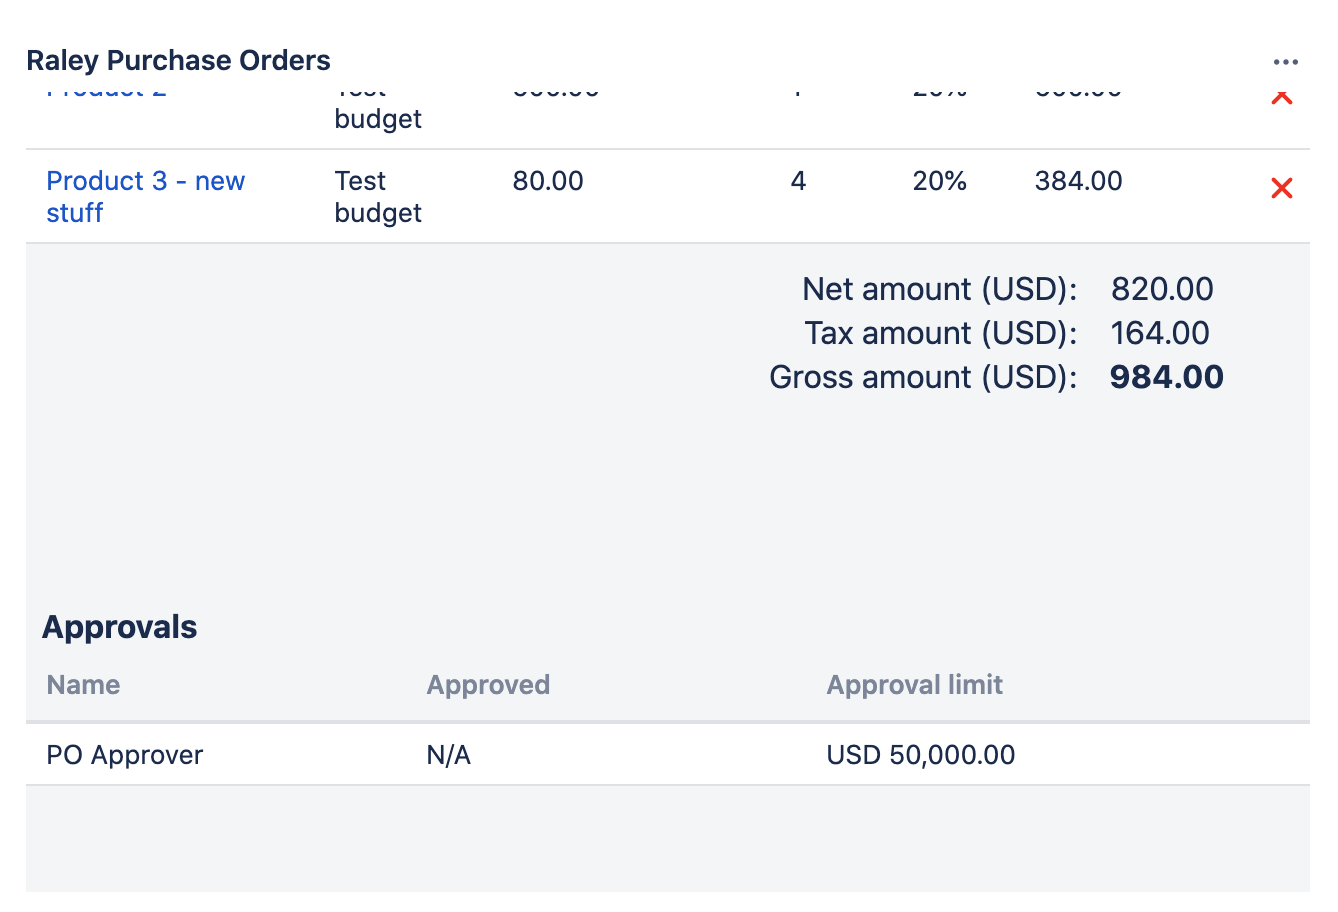
This means that the order must be approved by user PO Approver who has approval limit USD 50000 and currently the order is not approved yet (N/A). Approvers are assigned automatically based on selected Budget values in Purchase Order lines. Here's how it works:
1) Every configured Budget has exactly 1 Approver
2) When a Team Member is adding a purchase order line, he or she needs to provide a valid Budget value. If there's only one budget available for the Department in which current Purchase Order is defined then it will be automatically selected. Otherwise, the user has to choose to which budget this Purchase Order Line will be attributed.
3) Raley PO will determine which Approver applies to specific budget and show this approver in the list of Approvals
Every time a Purchase Order line is added, changed or deleted, Raley will re-calculate Approvals so, that the list of Approvals will correspond to the Budgets used in Purchase Order lines.
When a Team Member is finished with the creating of Purchase Order, he or she will need to click on Jira status transition button to send the Purchase order for approval.
Transitioning a Purchase Order for approval means that user must transition it to status "Submitted for Approval status". The screenshot below illustrates this:
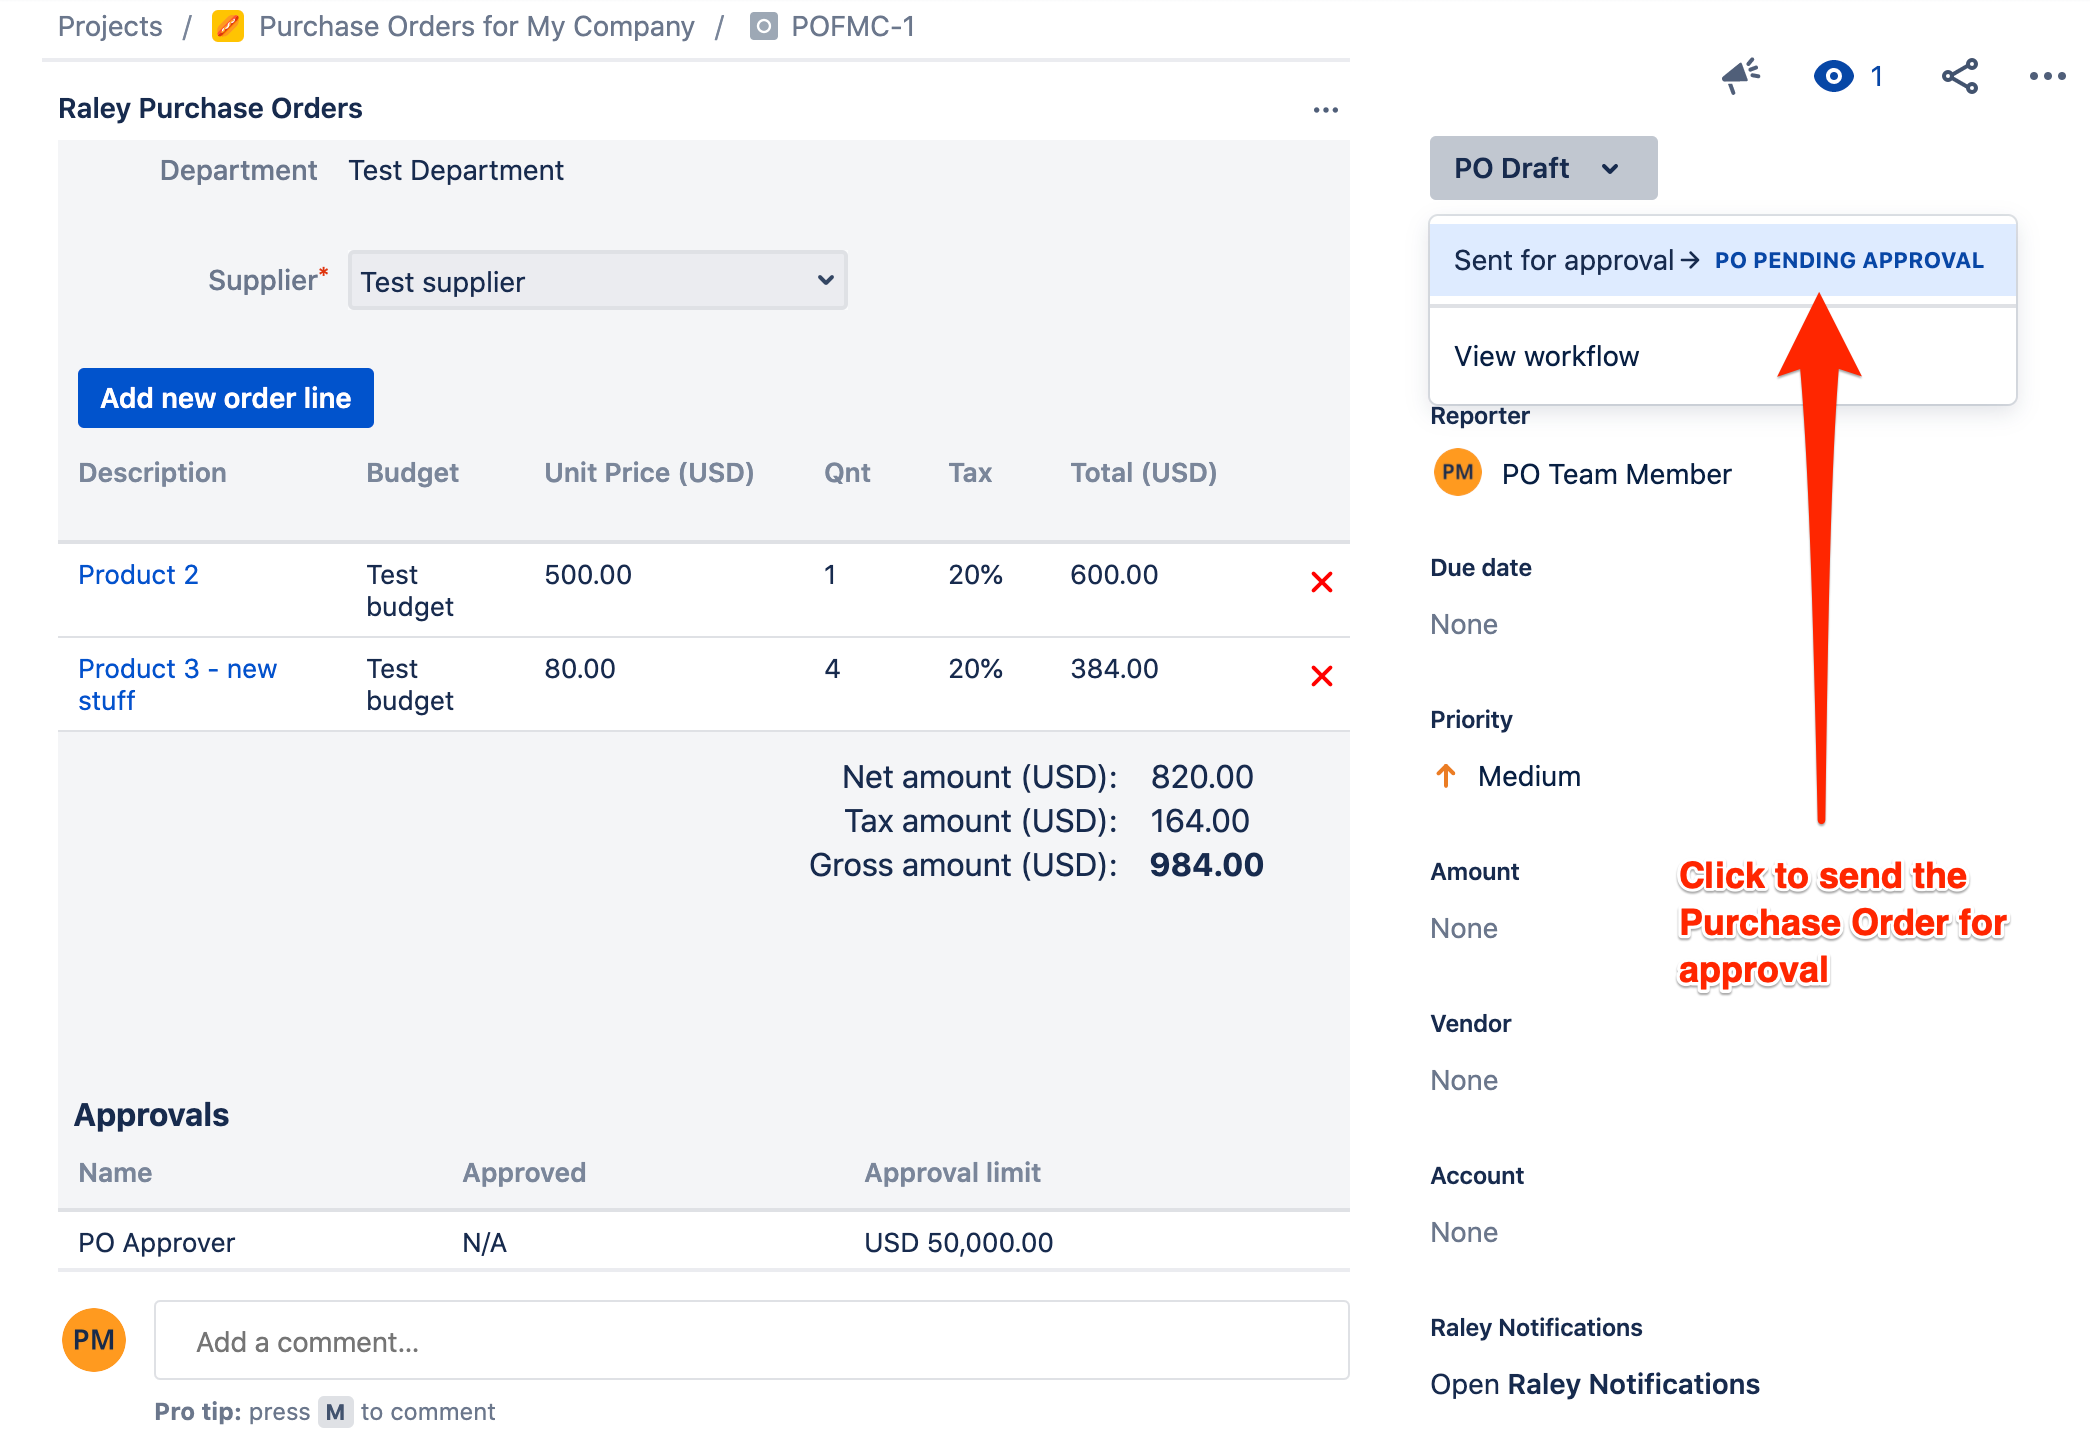
You can read more about Purchase Order statuses here
Once the transition is done, the Purchase Order screen is locked for modification by the Team Member and it is waiting for the Approval decision of Approver(s).
