Page History
...
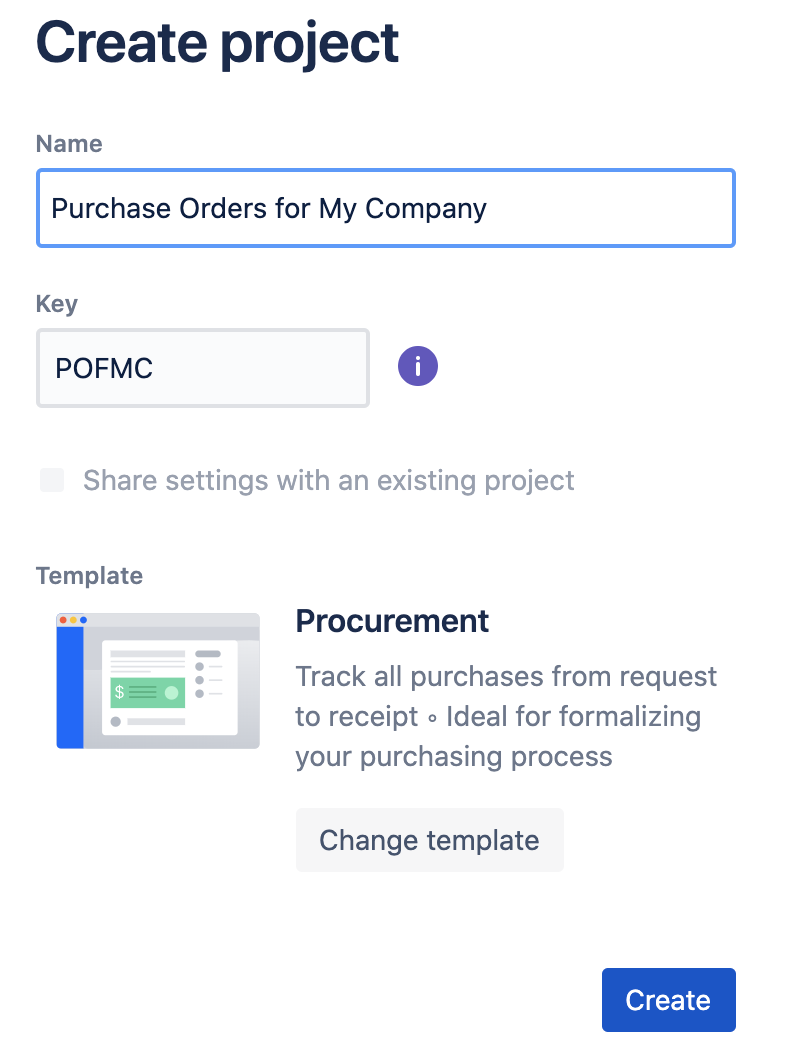
3. Create a new Jira Core project based on Business template Procurement like the following:
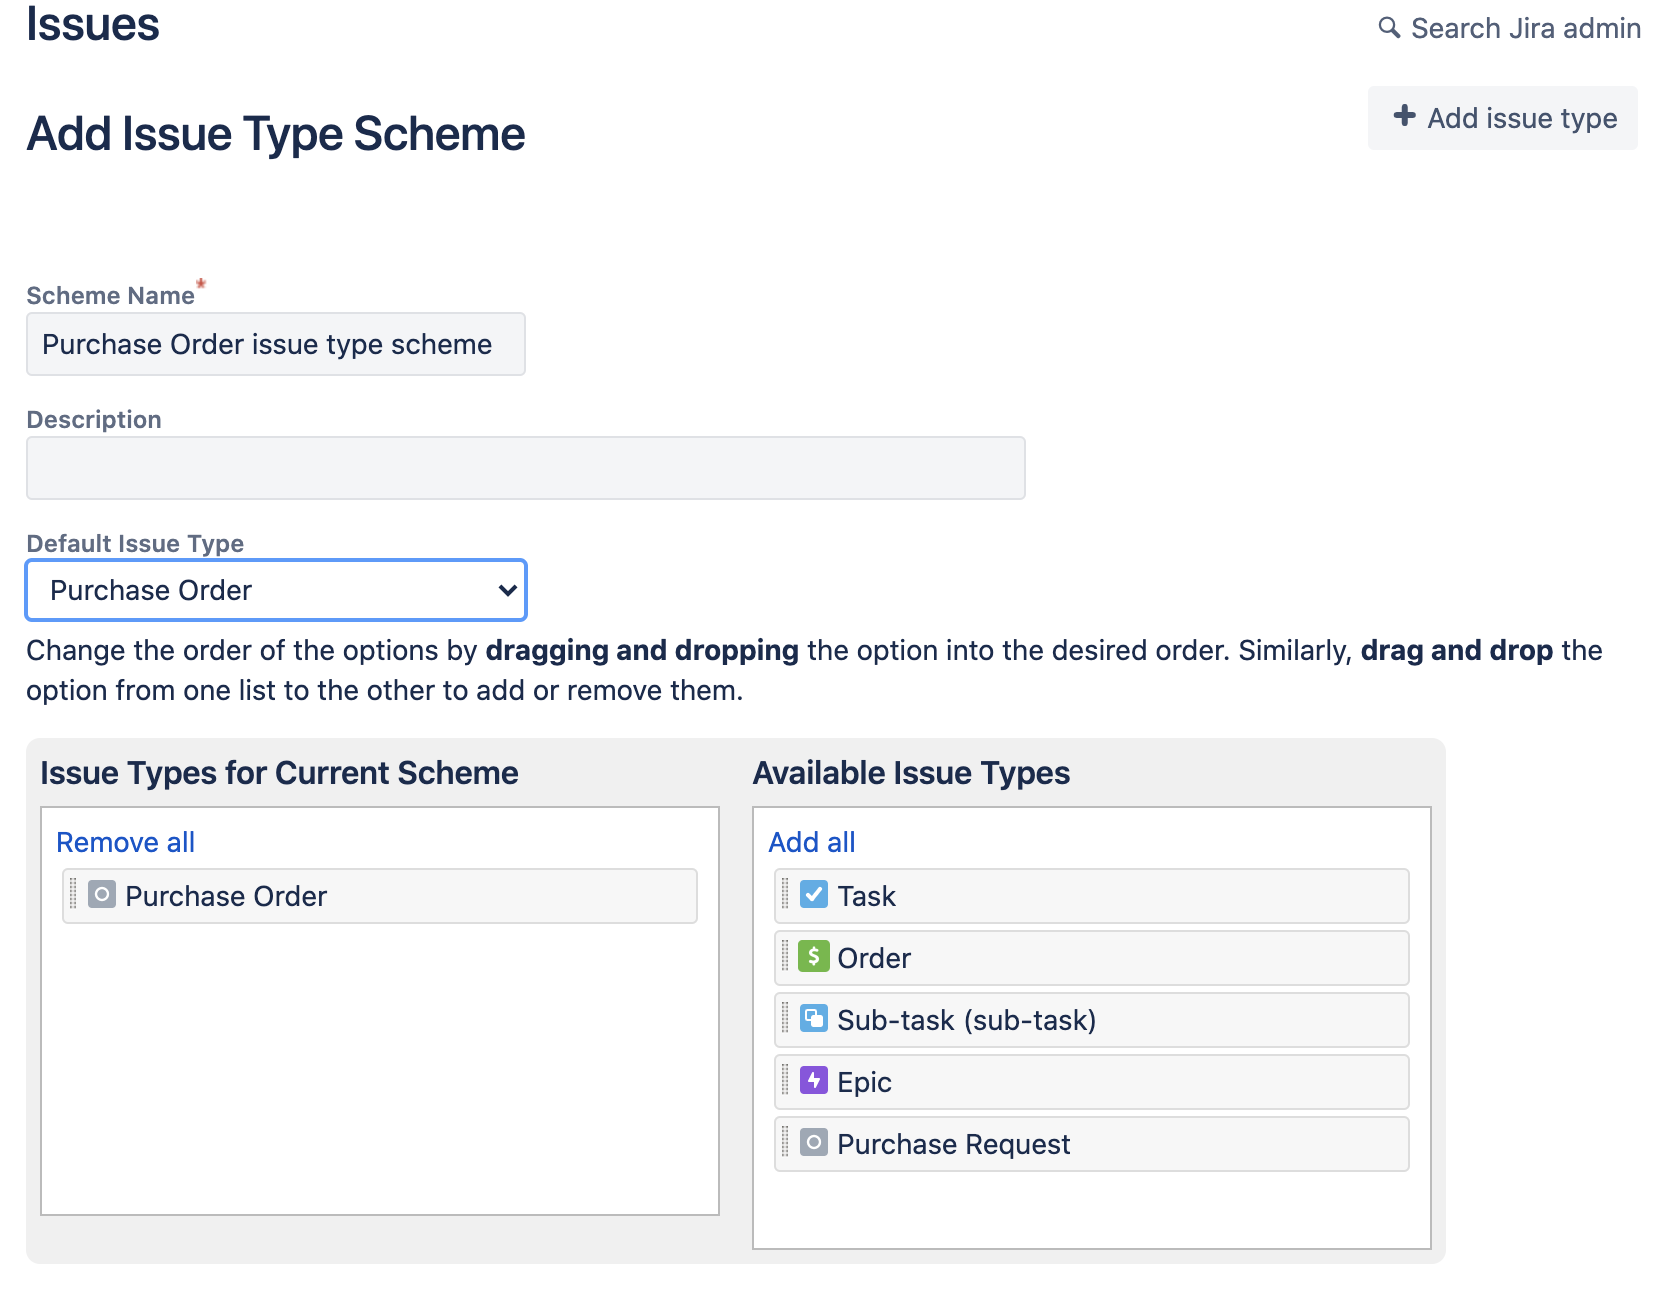
4. Go to Project Settings of your newly created project. Open link Settings → Issues -> "Issue type schemes" and click on the button "Add issue type scheme" in the top right. Make sure that you have your newly added issue type listed in "Issue types for current scheme window" and that it is also set as Default issue type.
5. In the Project Settings click on Go to Settings → Issues -> "Workflow schemes" link. Choose the Workflow scheme corresponding to your project and click on link Edit as shown below:
...
You'll be presented with list of the workflows configured for your project. Remove the previously active workflow (if any) as shown on the screenshot below:
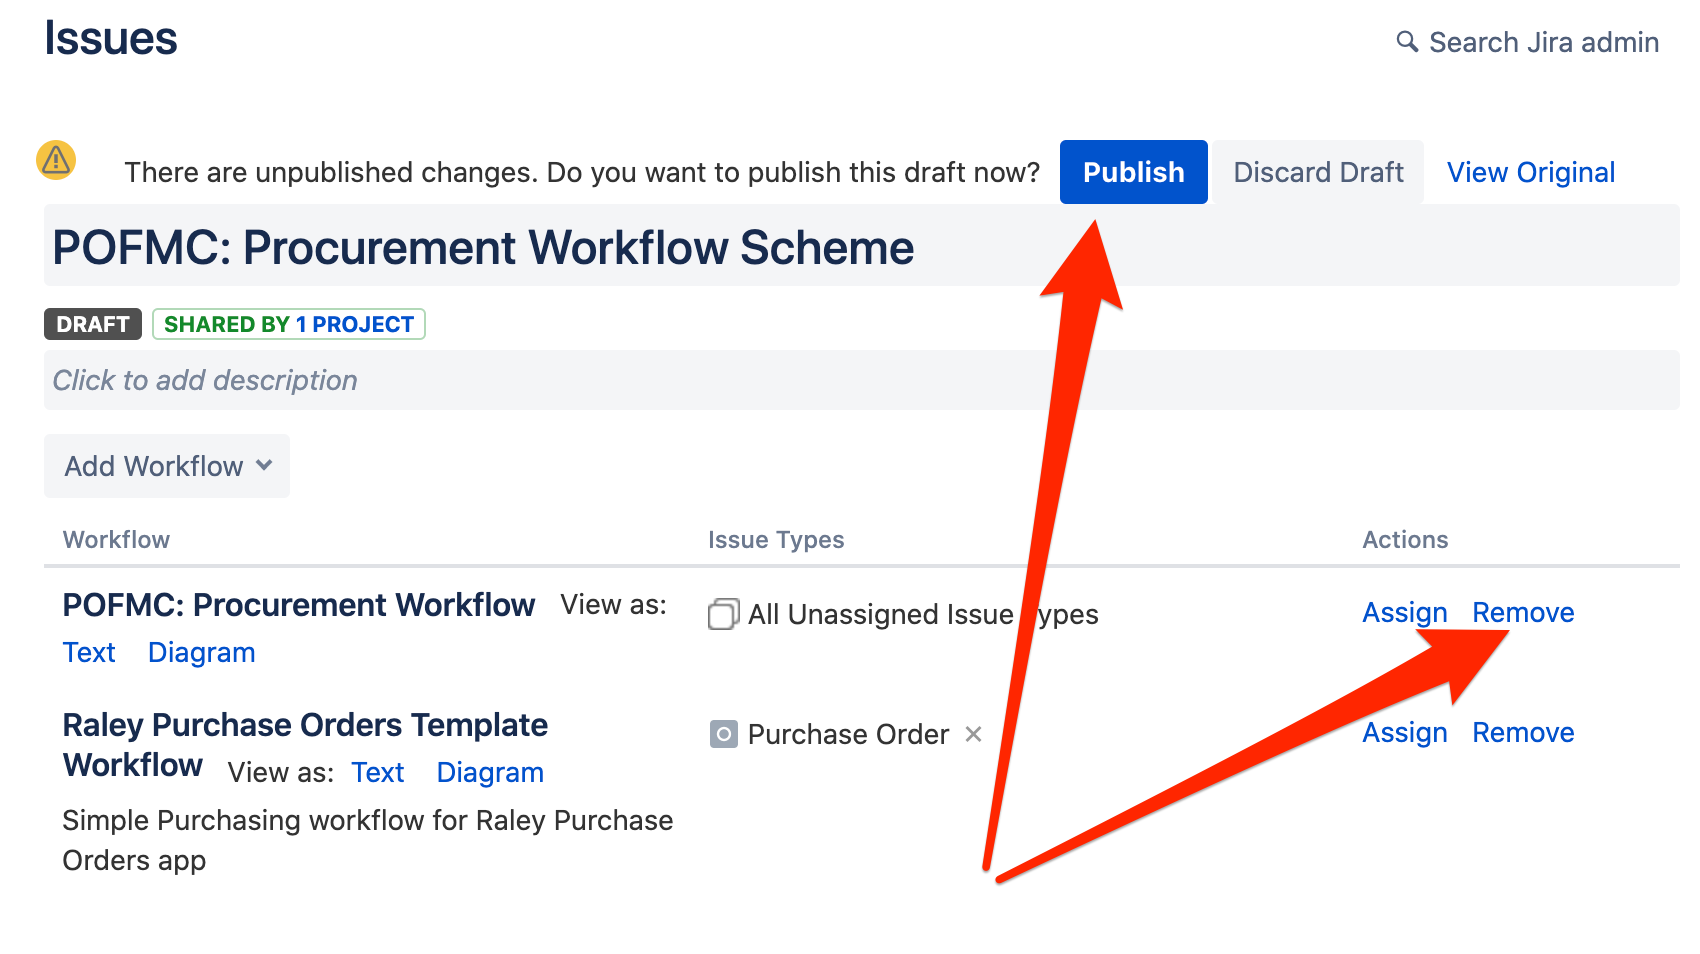
and click on Publish button.
6. In POFMC: Procurement Workflow make sure that you've hidden the following transitions from user:
- PO Pending approval → PO Approved
- PO Pending approval → PO Rejected.
See Conditions / Optional conditions/ Hide From User Condition on https://confluence.atlassian.com/adminjiracloud/advanced-workflow-configuration-776636620.html#Advancedworkflowconfiguration-conditions
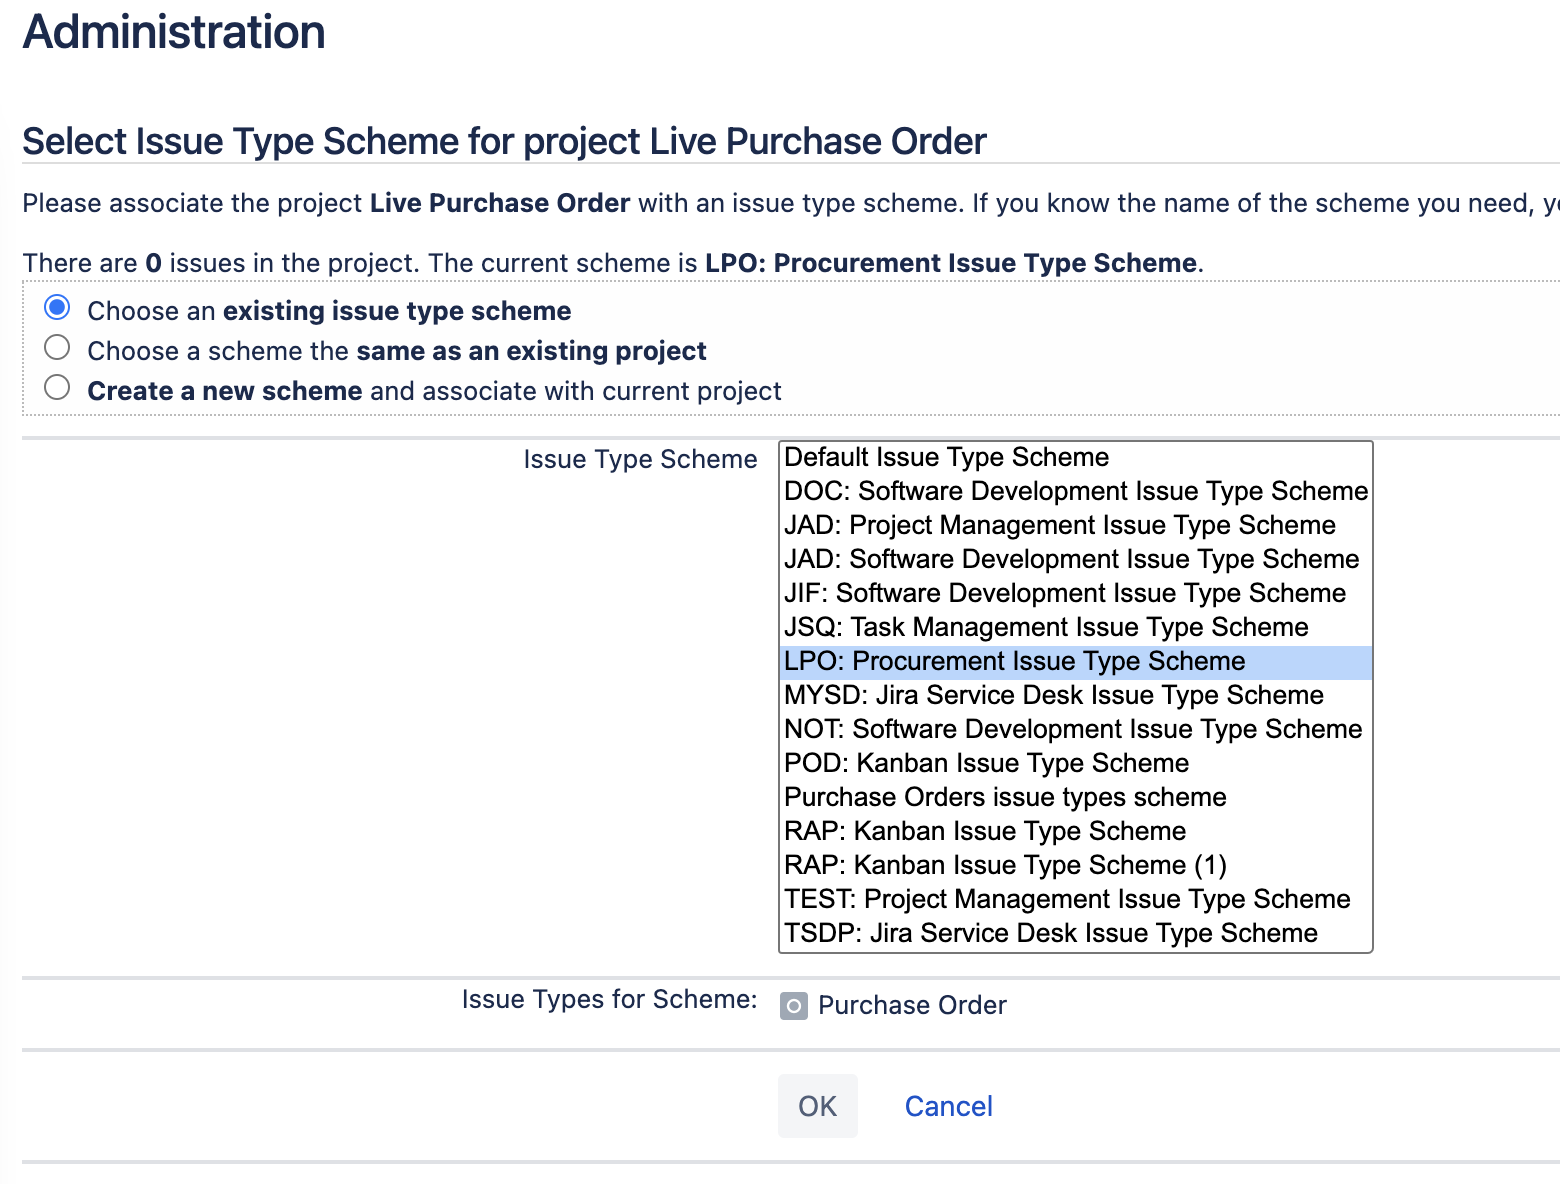
7. Navigate to your project settings → Issue types. Click on button Actions → Edit Issue Types and make sure that Purchase Order is chosen as an issue type for the current scheme and it is also set as Default issue type.
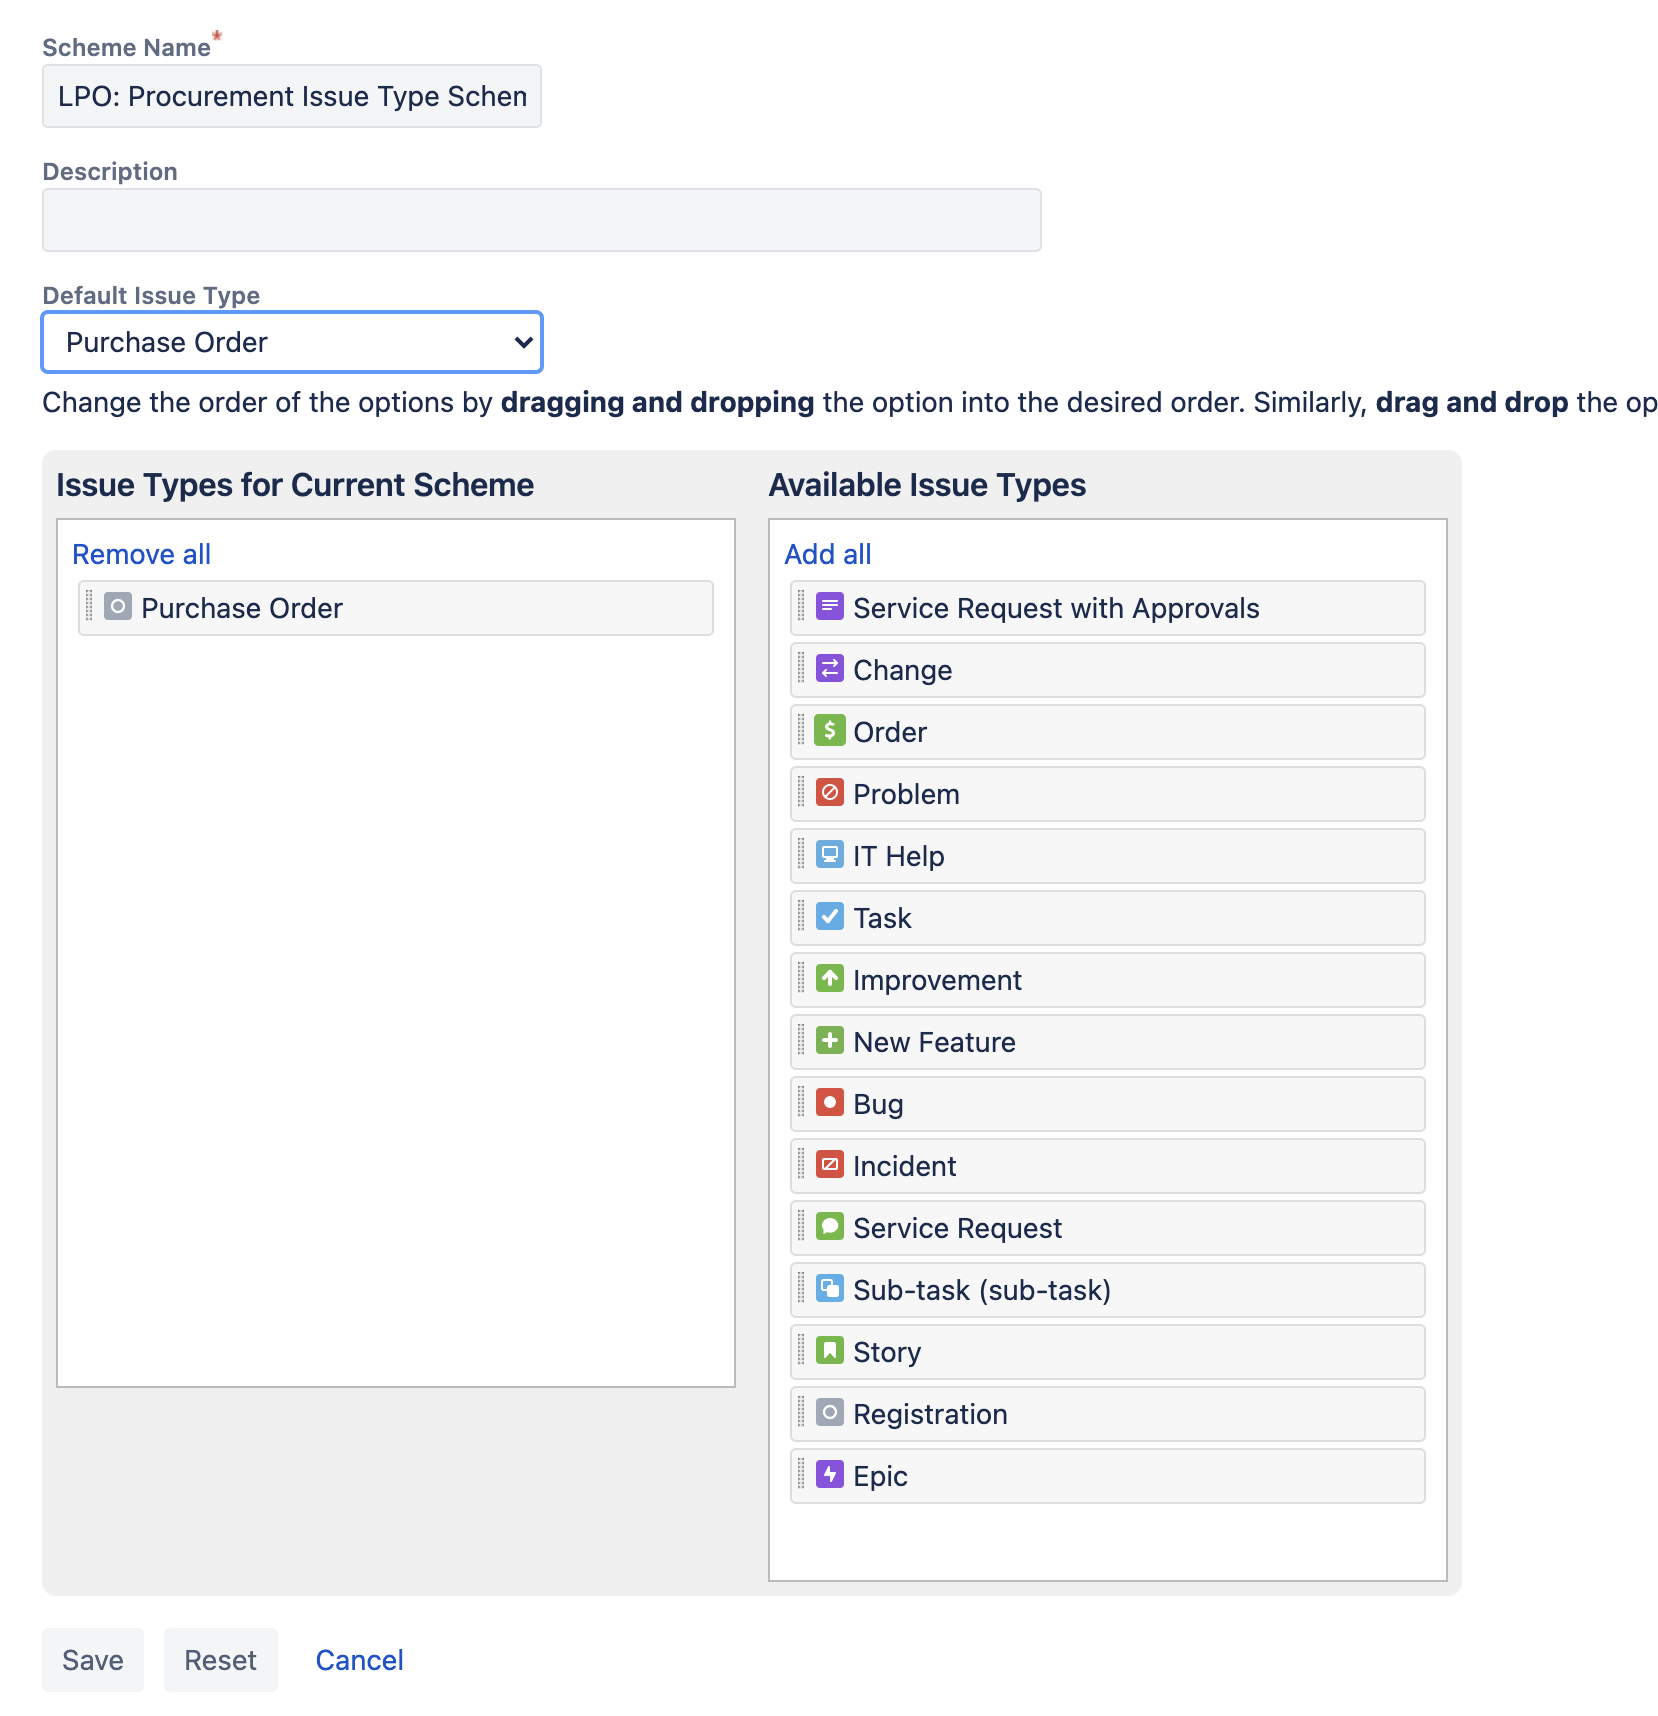
Then click on Actions → User a different scheme and make adjustments as shown below:
8. Log in as Jira user that was used to install Raley PO app in the UPM. That user is automatically assigned to Company Admin privilege in Raley PO and it should be used to create other Raley PO users.
.6. Navigate to your Jira Universal Plugin Manager, choose Raley Purchase Orders and click on Configure button.
- In Jira config tab assign the following:
- Purchase Orders project - the project that you've created in step (3)
- Purchase Orders issue type - the issue type you've created in step (1)
- JSM Request type - the JSM request type for which you want the Raley PO to be shown if you're on a JSM project. By default, it will not be visible
- Statuses as shown on the screenshot below
- In Jira config tab assign the following:
...
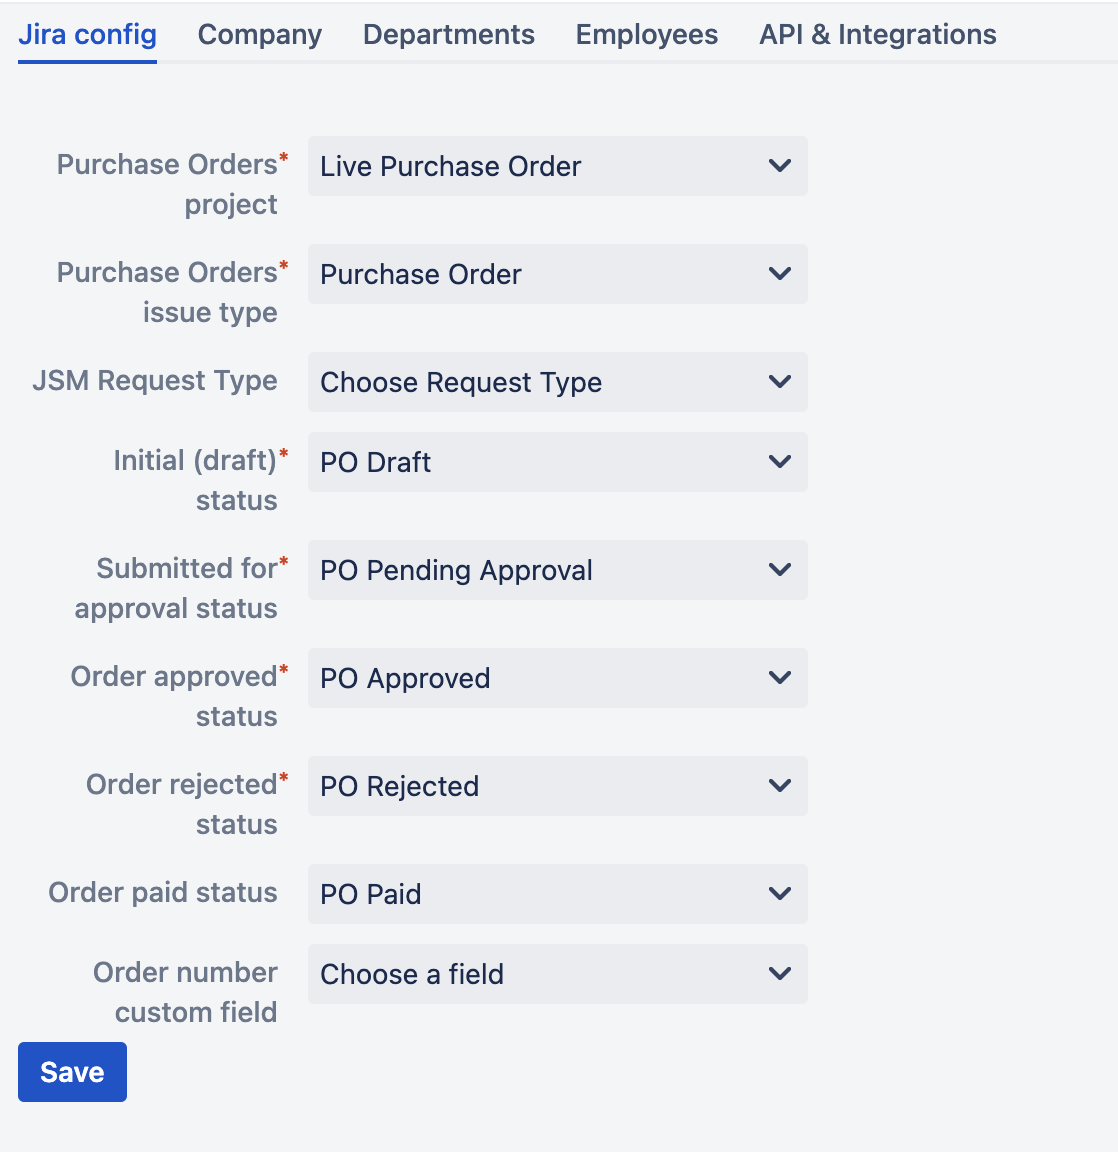
- Order number custom field - a custom field in your Jira from which to retrieve purchase order number. More information on automatic generation of PO# is available here
For more information about the statuses and their business meaning please refer to this article
- In Company tab assign the following
- Company name - name of your Company
- In Departments tab - you define your company's organisational units and their details. At this point do not specify Employees for the department, as you will do that in the next step.
- In Employees tab - you configure your Jira users as company employees. One employee can be associated to 1..N departments and can also have multiple roles. If employee has Approval role then you should also provide his/her approval limit.
- API & Integrations tab - token for your B2B integration with our app
- In Company tab assign the following
79. Add an employee with Finance role - he or she will need to configure Default currency, Taxes, Budgets and Suppliers applicable for your company
...
