Setup from scratch
If you haven't used the RPO before or would like to start from the beginning then follow the steps in this article.
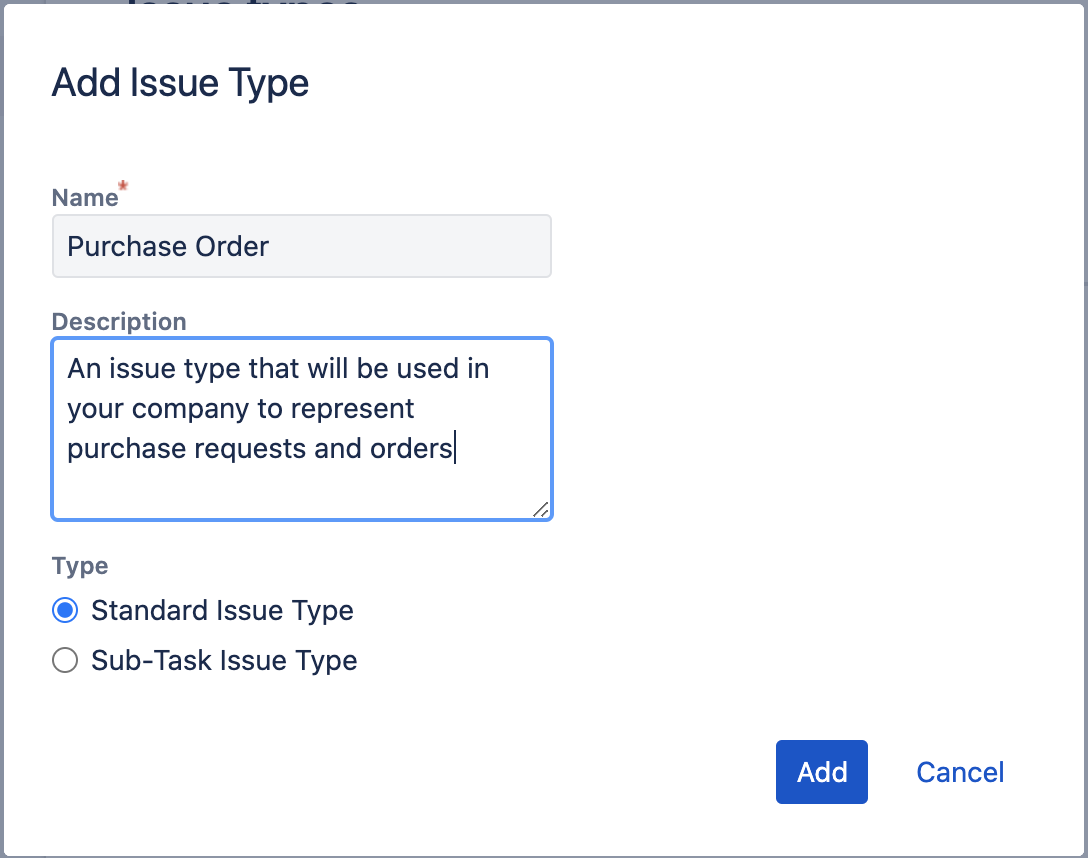
- Create a new Jira issue type that will represent your Purchasing Orders. Note, that your issue type must be Standard issue type, not subtask.
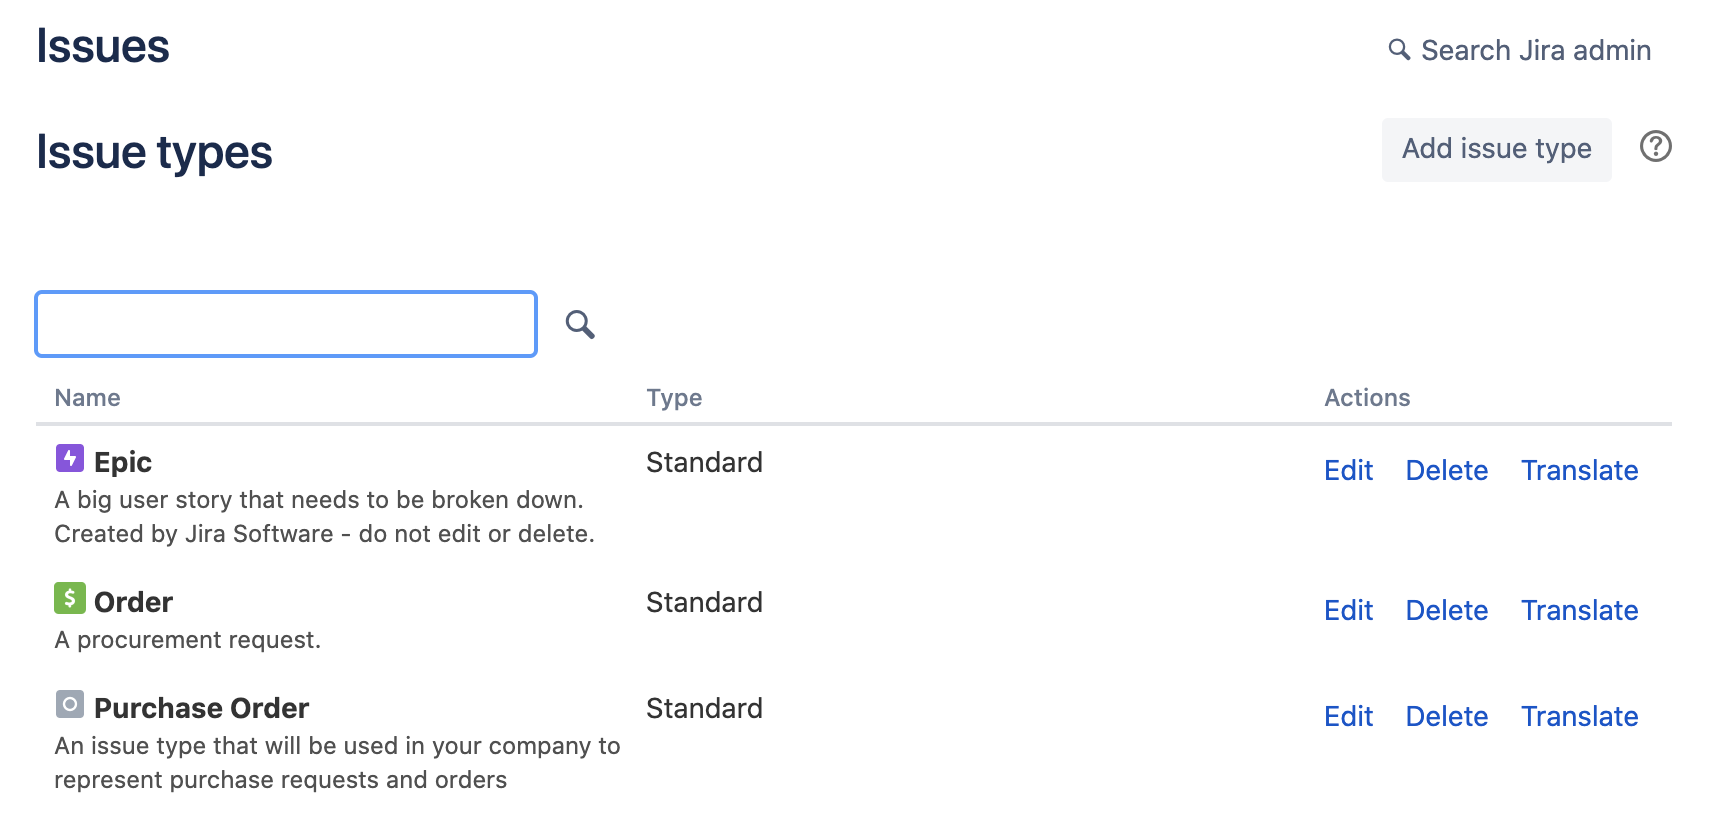
Your newly added issue type "Purchase Order" will appear under list of Jira issue types:
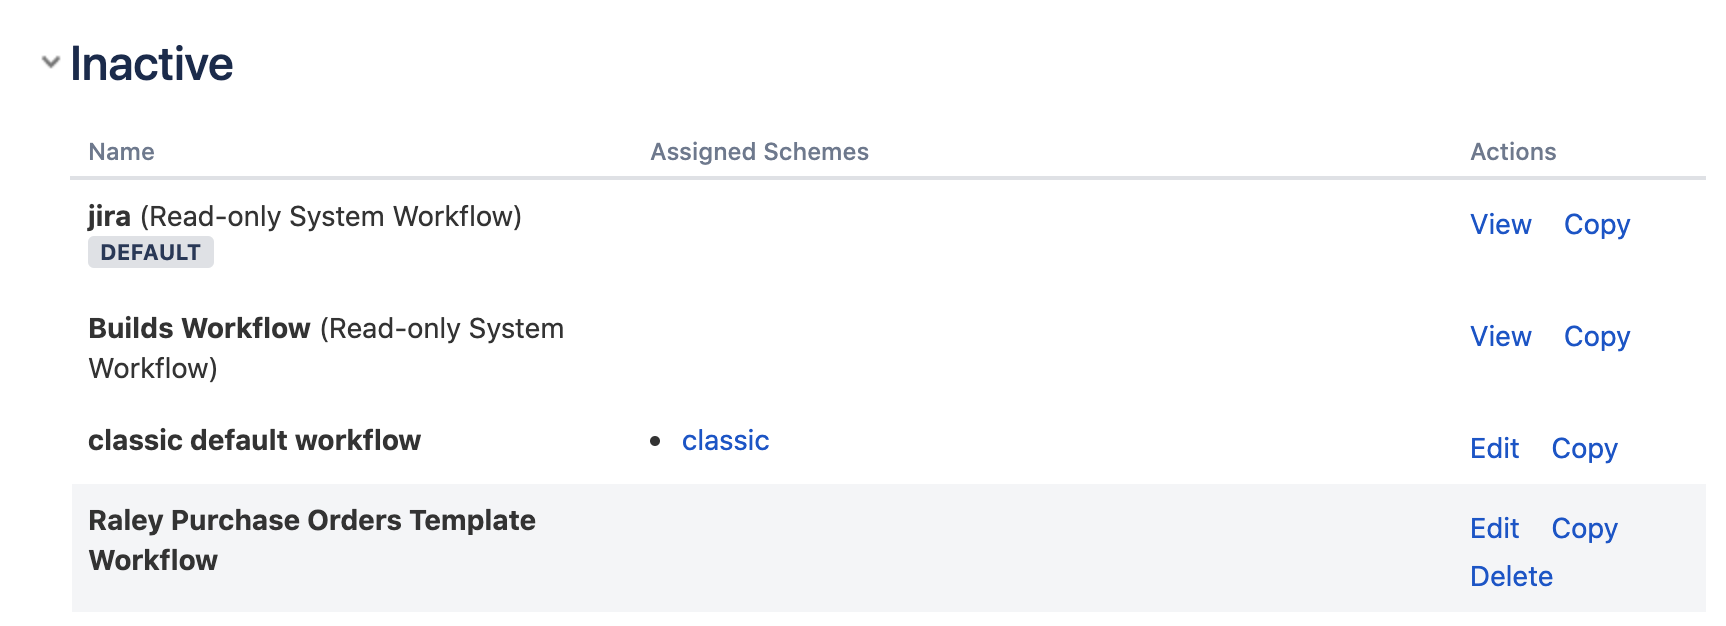
2. Import "Raley Purchase Orders template workflow" from Atlassian marketplace. It should appear in the list of inactive workflows of your Jira:
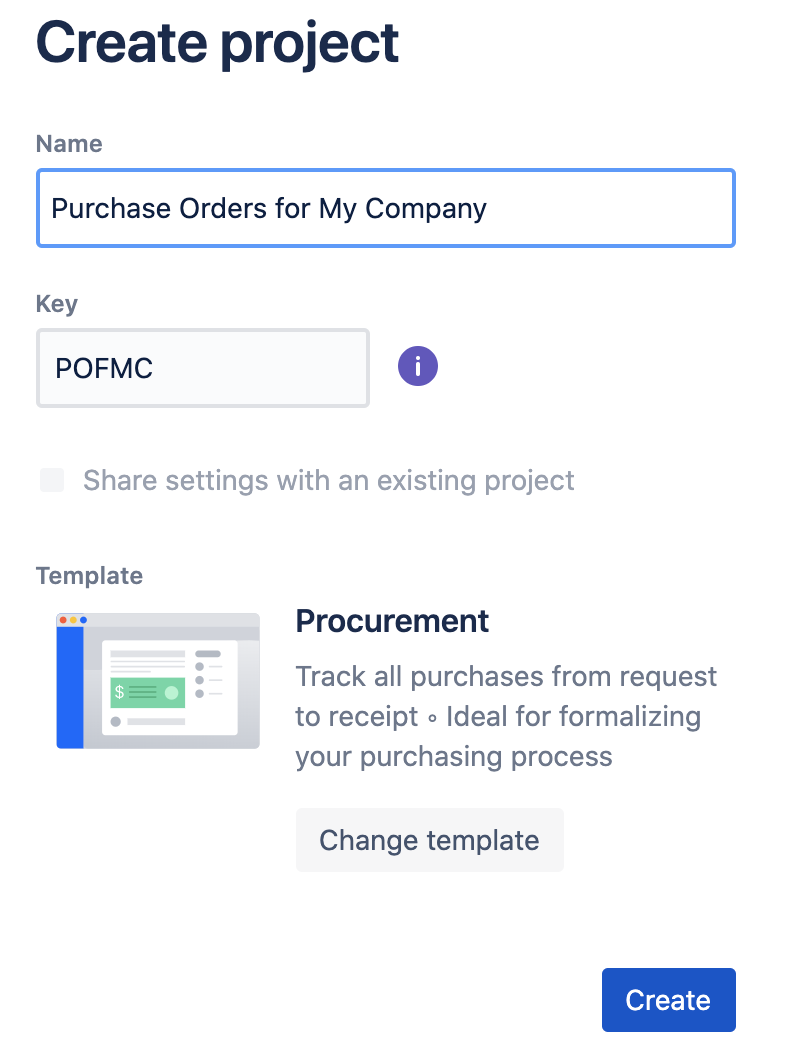
3. Create a new Jira Core project based on Business template Procurement like the following:
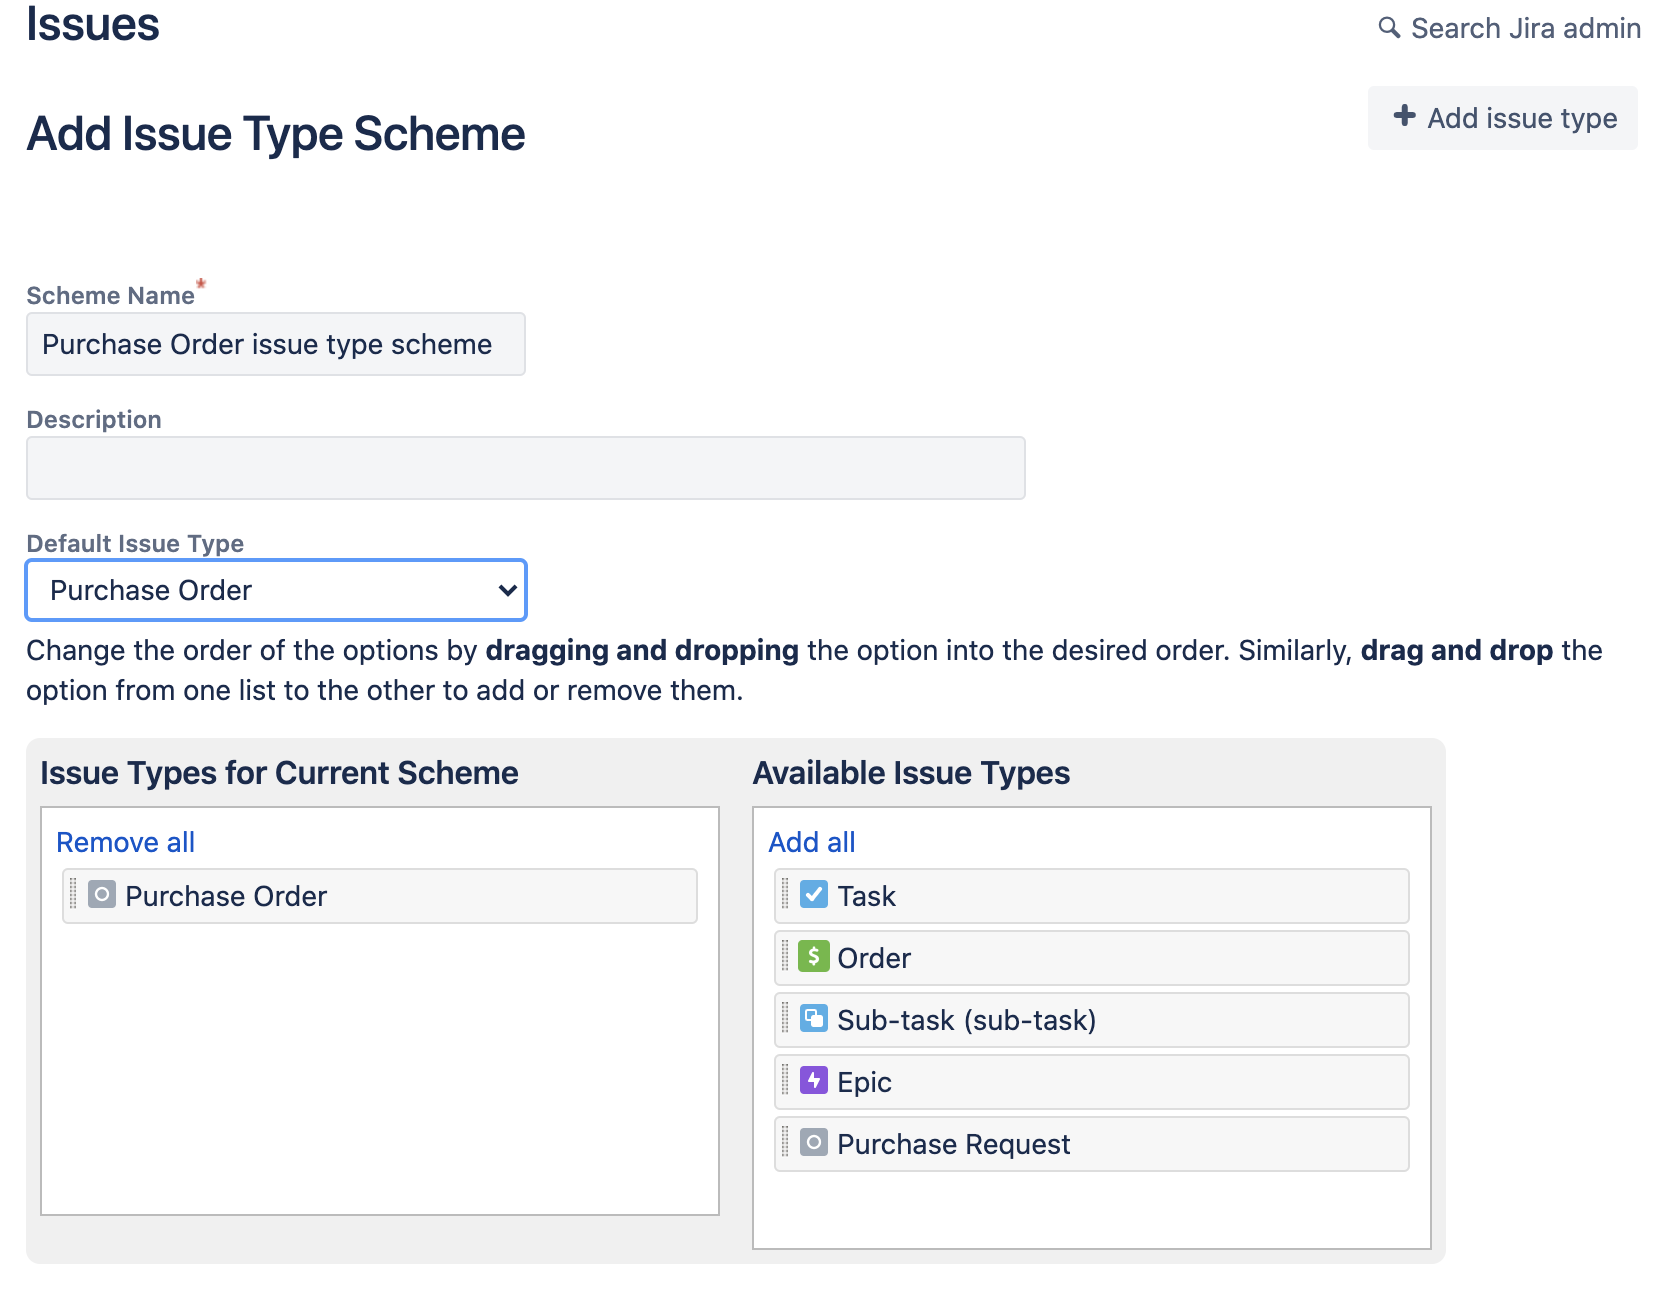
4. Go to Project Settings of your newly created project. Open link "Issue type schemes" and click on the button "Add issue type scheme" in the top right. Make sure that you have your newly added issue type listed in "Issue types for current scheme window" and that it is also set as Default issue type.
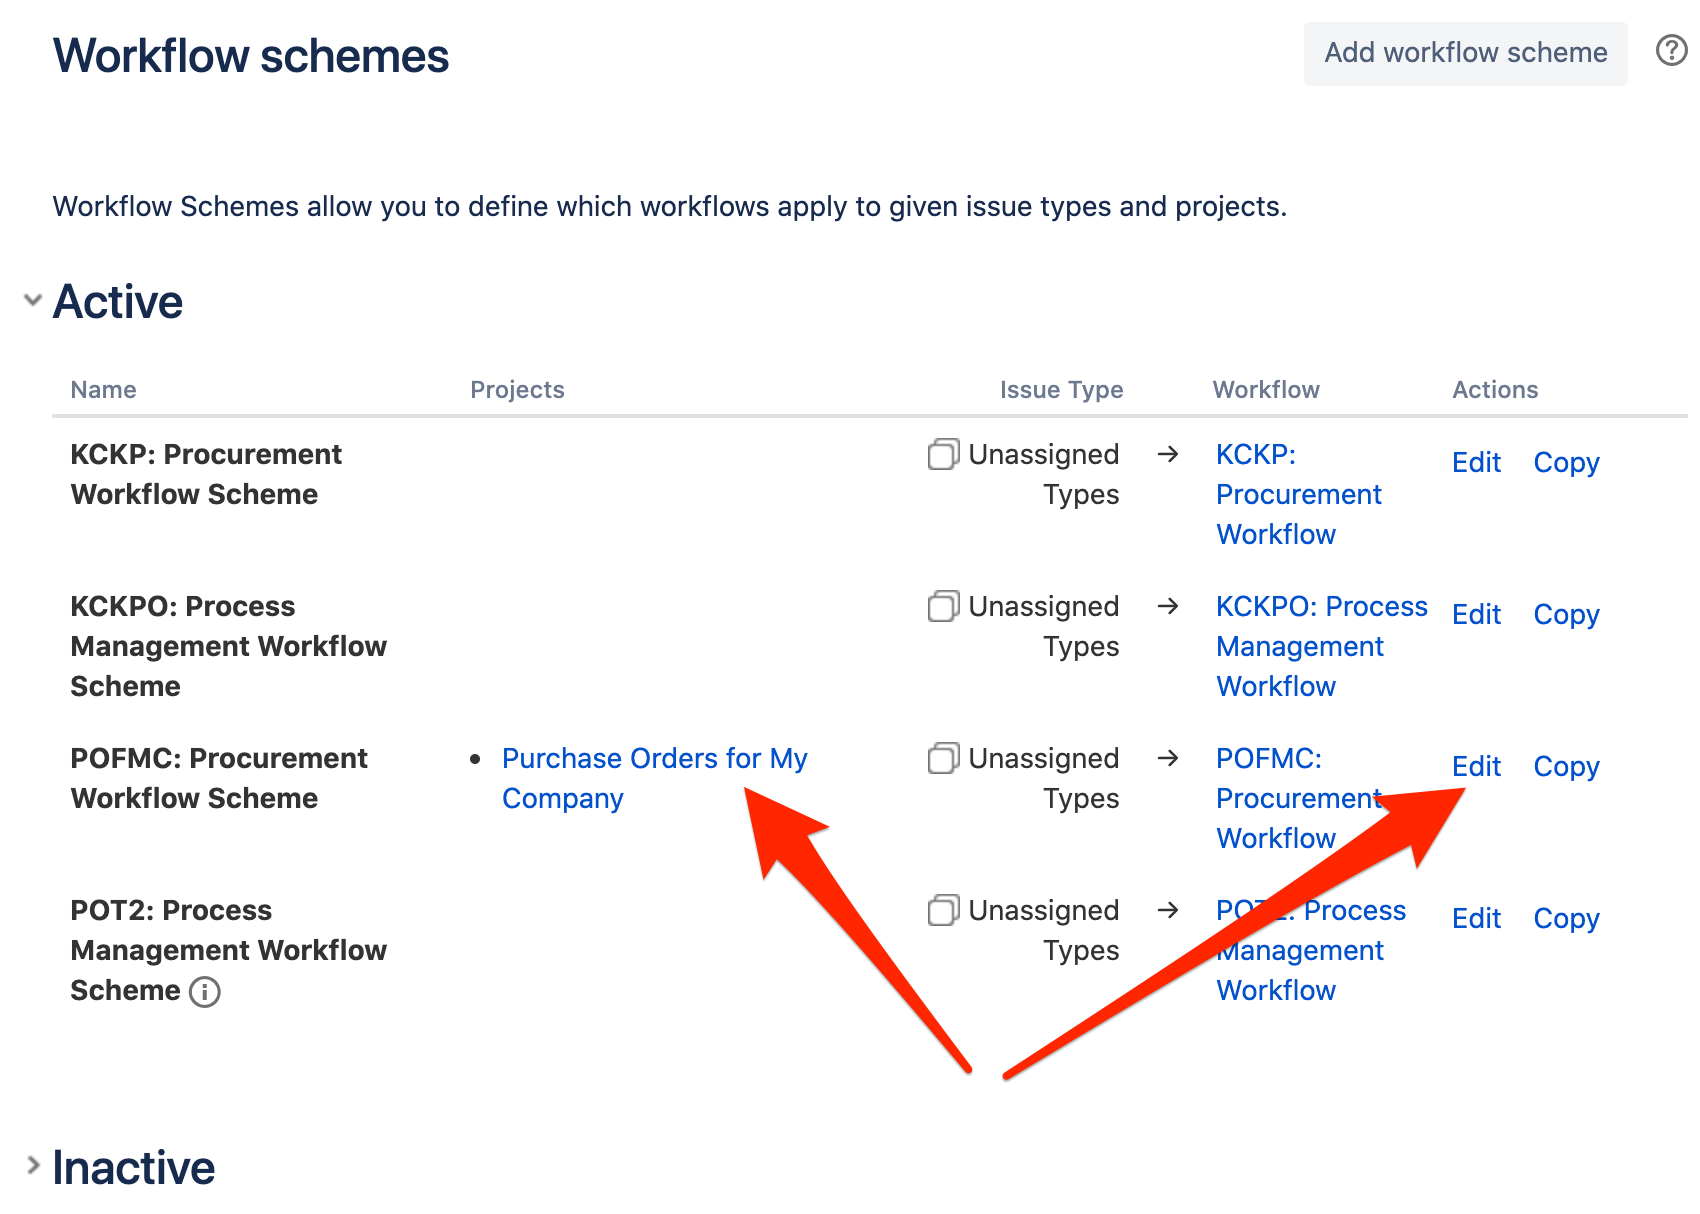
5. In the Project Settings click on Workflow schemes link. Choose the Workflow scheme corresponding to your project and click on link Edit as shown below:
Click on button Add workflow → Add existing and choose "Raley Purchase Orders Template workflow".

Click Next. In the following screen:
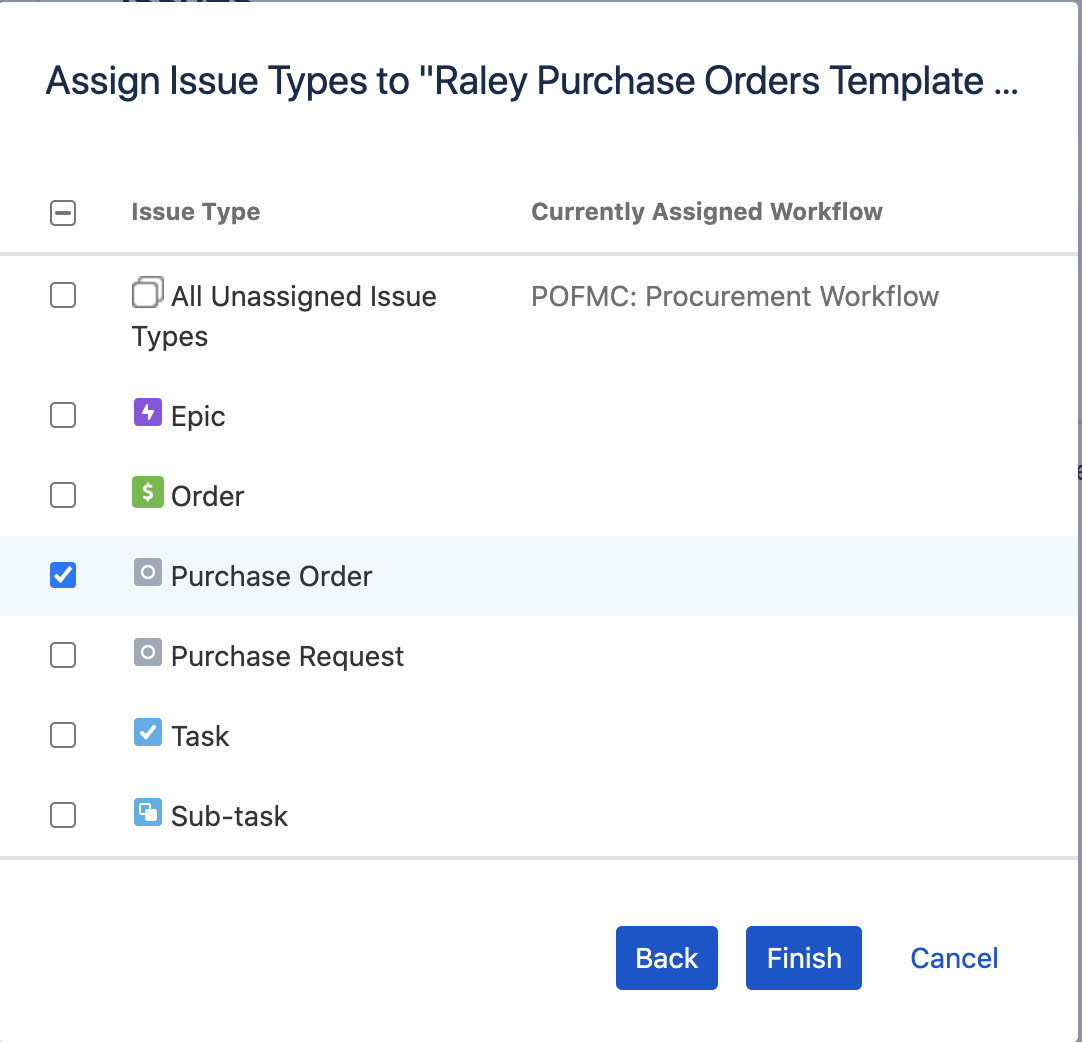
Choose your issue type added in p1 and click Finish.
You'll be presented with list of the workflows configured for your project. Remove the previously active workflow (if any) as shown on the screenshot below:
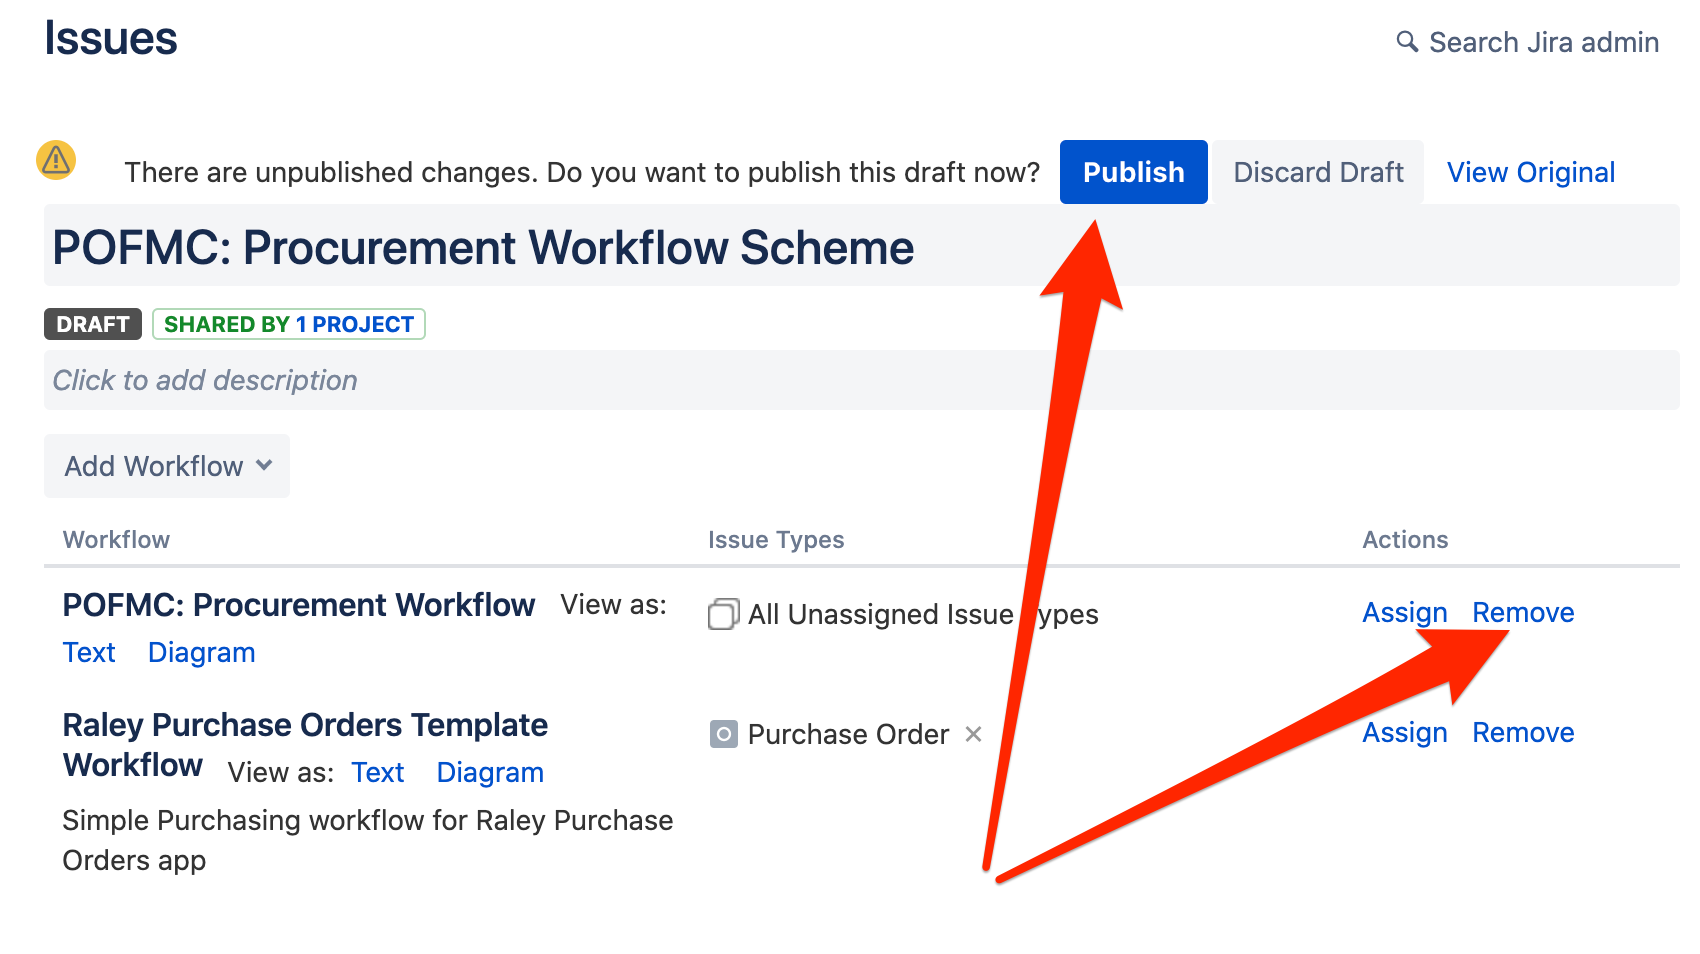
and click on Publish button.
6. Navigate to your Jira Universal Plugin Manager, choose Raley Purchase Orders and click on Configure button.
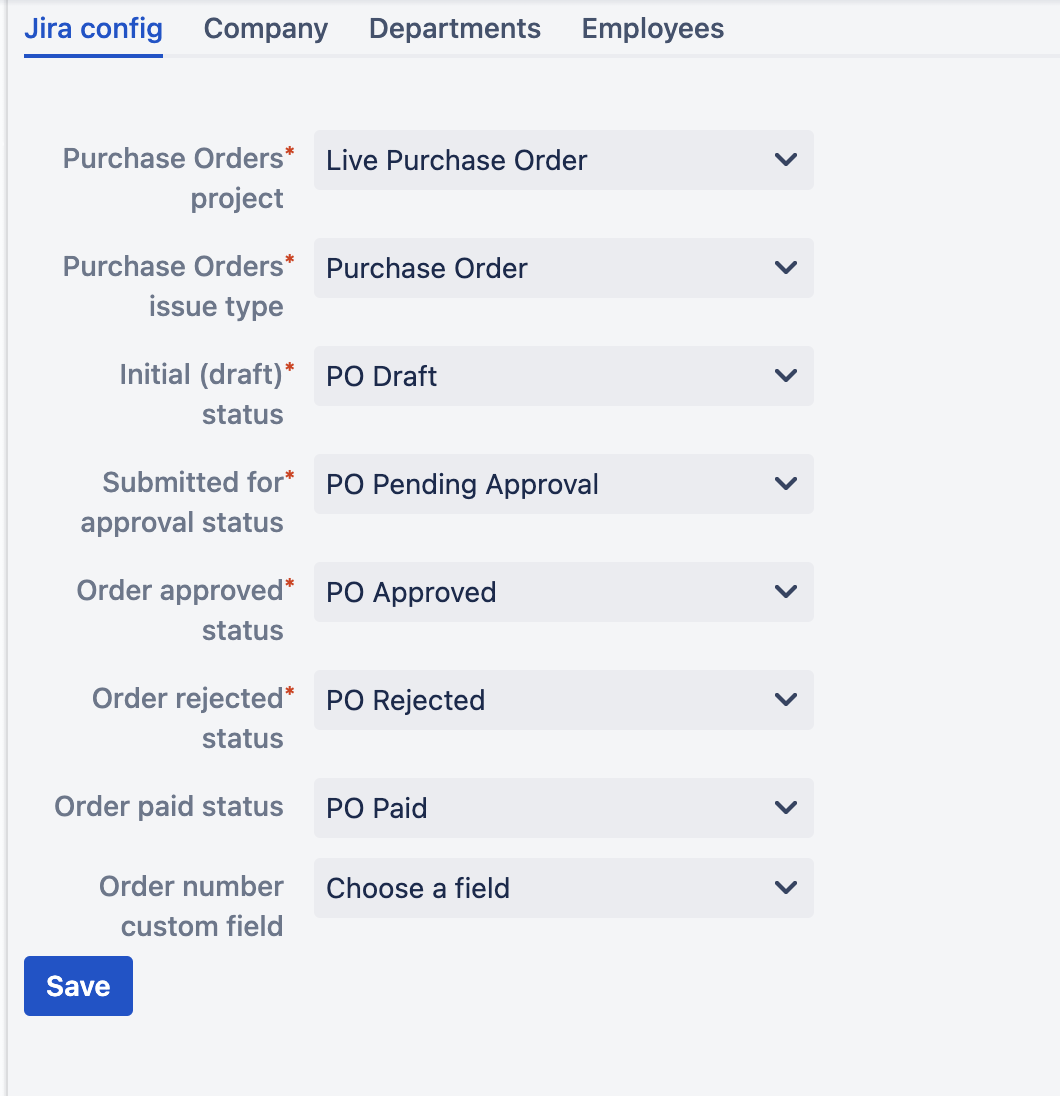
- In Jira config tab assign the following:
- Purchase Orders project - the project that you've created in step (3)
- Purchase Orders issue type - the issue type you've created in step (1)
- Statuses as shown on the screenshot below
- In Jira config tab assign the following:
For more information about the statuses and their business meaning please refer to this article
- In Company tab assign the following
- Company name - name of your Company
- In Departments tab - you define your company's organisational units and their details. At this point do not specify Employees for the department, as you will do that in the next step.
- In Employees tab - you configure your Jira users as company employees. One employee can be associated to 1..N departments and can also have multiple roles. If employee has Approval role then you should also provide his/her approval limit.
- In Company tab assign the following
7. Add an employee with Finance role - he or she will need to configure Default currency, Taxes, Budgets and Suppliers applicable for your company
Setup for already existing Purchase Order project
Raley Purchase Order makes the following assumptions about your instance:
1) One Jira instance is used by 1 organisation
2) All purchasing processes in this organisation are currently run in 1 Jira project
This effectively means that you can have several Jira projects meant for running your purchasing processes, however, only one of them will be actively connected to the Raley Purchase Orders.
This setup is applicable if you either previously used Raley Purchase Orders and have actual orders data or if you decided to switch to a different Jira project/issue type/workflow for running your purchasing processes. Switching to a different Jira project/ issue type/ workflow will not erase your data from Raley PO. It will stay there as is and you can always return to it by changing configuration as indicated in previous paragraph (4, 5a, 5b).
It is important to understand that while the actual purchase order related data stays intact in our add-on, your inactive (from Raley PO perspective) Jira project continues to live on its own pace, so there could be inconsistencies between statuses of the tickets in Jira and the statuses of appropriate purchase orders in Raley PO.