Page History
Raley Notifications originally used legacy Slack token to perform sending messages to Slack channels. According to Slack, legacy token is a deprecated technology and one should use OAuth instead.
Starting from Raley Notifications version ... you can only use Slack OAuth with your new notifications configurations that are sending to Slack.
Existing notification that are using legacy Slack tokens will continue to function in "read-only" mode, which means that the messengers will continue to work, however, you cannot modify them without switching to Slack OAuth.
Once you open the Notification, the following message will be shown:

We strongly advice you to perform migration of your existing notification configurations to use Slack OAuth for security reasons.
Here're the steps you need to take to perform the migration or setting up a new Notification with Slack OAuthIf you want to send messages to a Slack channel, you must configure your Raley notification to use Slack OAuth. This article explains the process in details.
1) Navigate to https://api.slack.com/apps?new_app and click on Create New App button in the top right corner
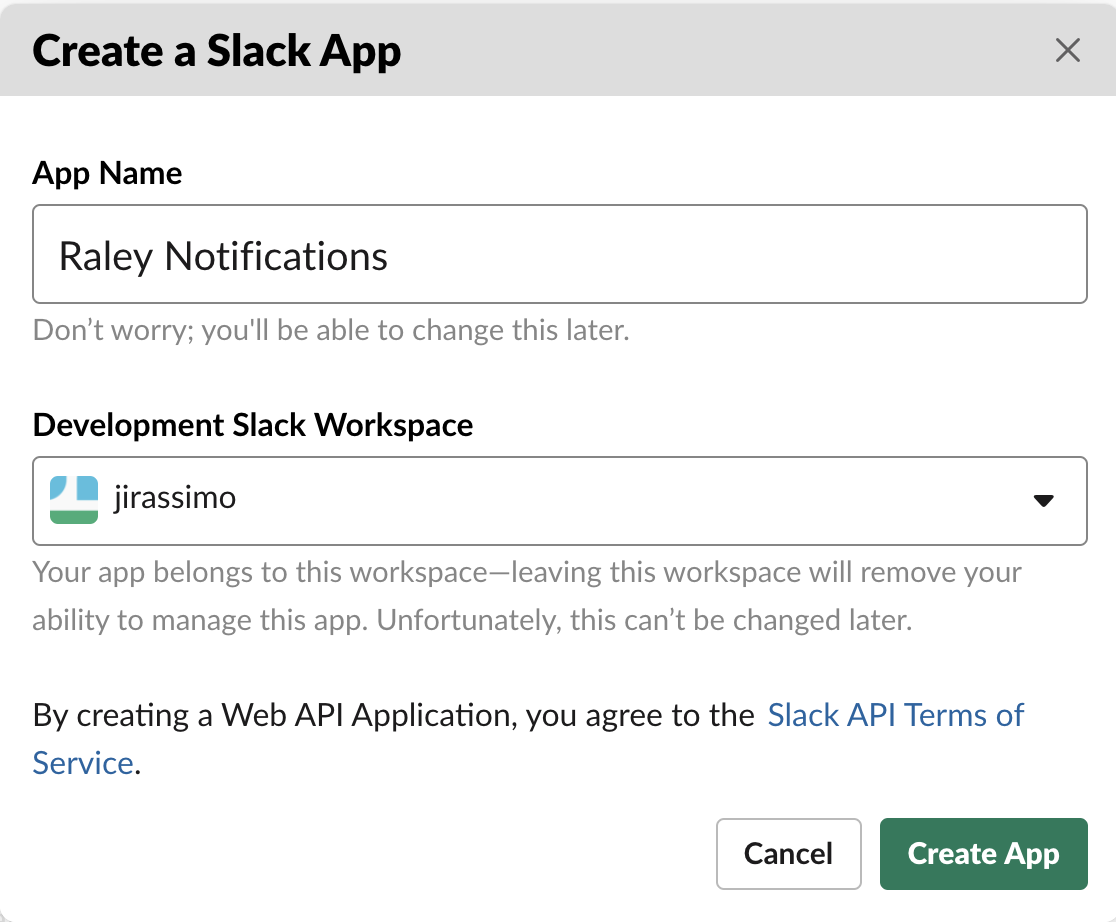
2) In the pop-up dialog type "Raley Notifications" into App Name and choose your Slack workspace. Then click Create App
3)
...
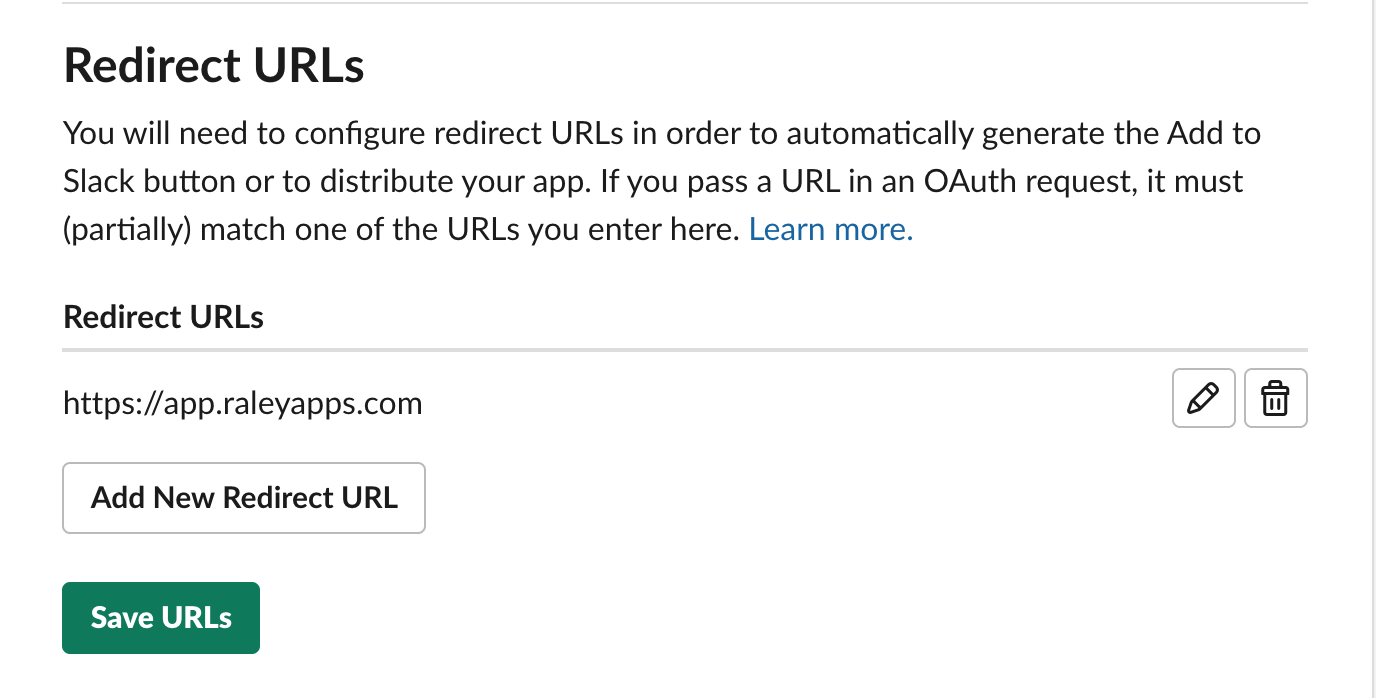
On the left-hand menu click on Features -> OAuth & Permissions. In Redirect URLs section click on button Add new Redirect URL and paste the following value there:
https://app.raleyapps.com
Click on Add button and then on Save URLs button. Your Redirect URLs section should look like this:
4) On the left-hand menu click Settings-> Basic Information. Scroll down to section App Credentials which looks like this:
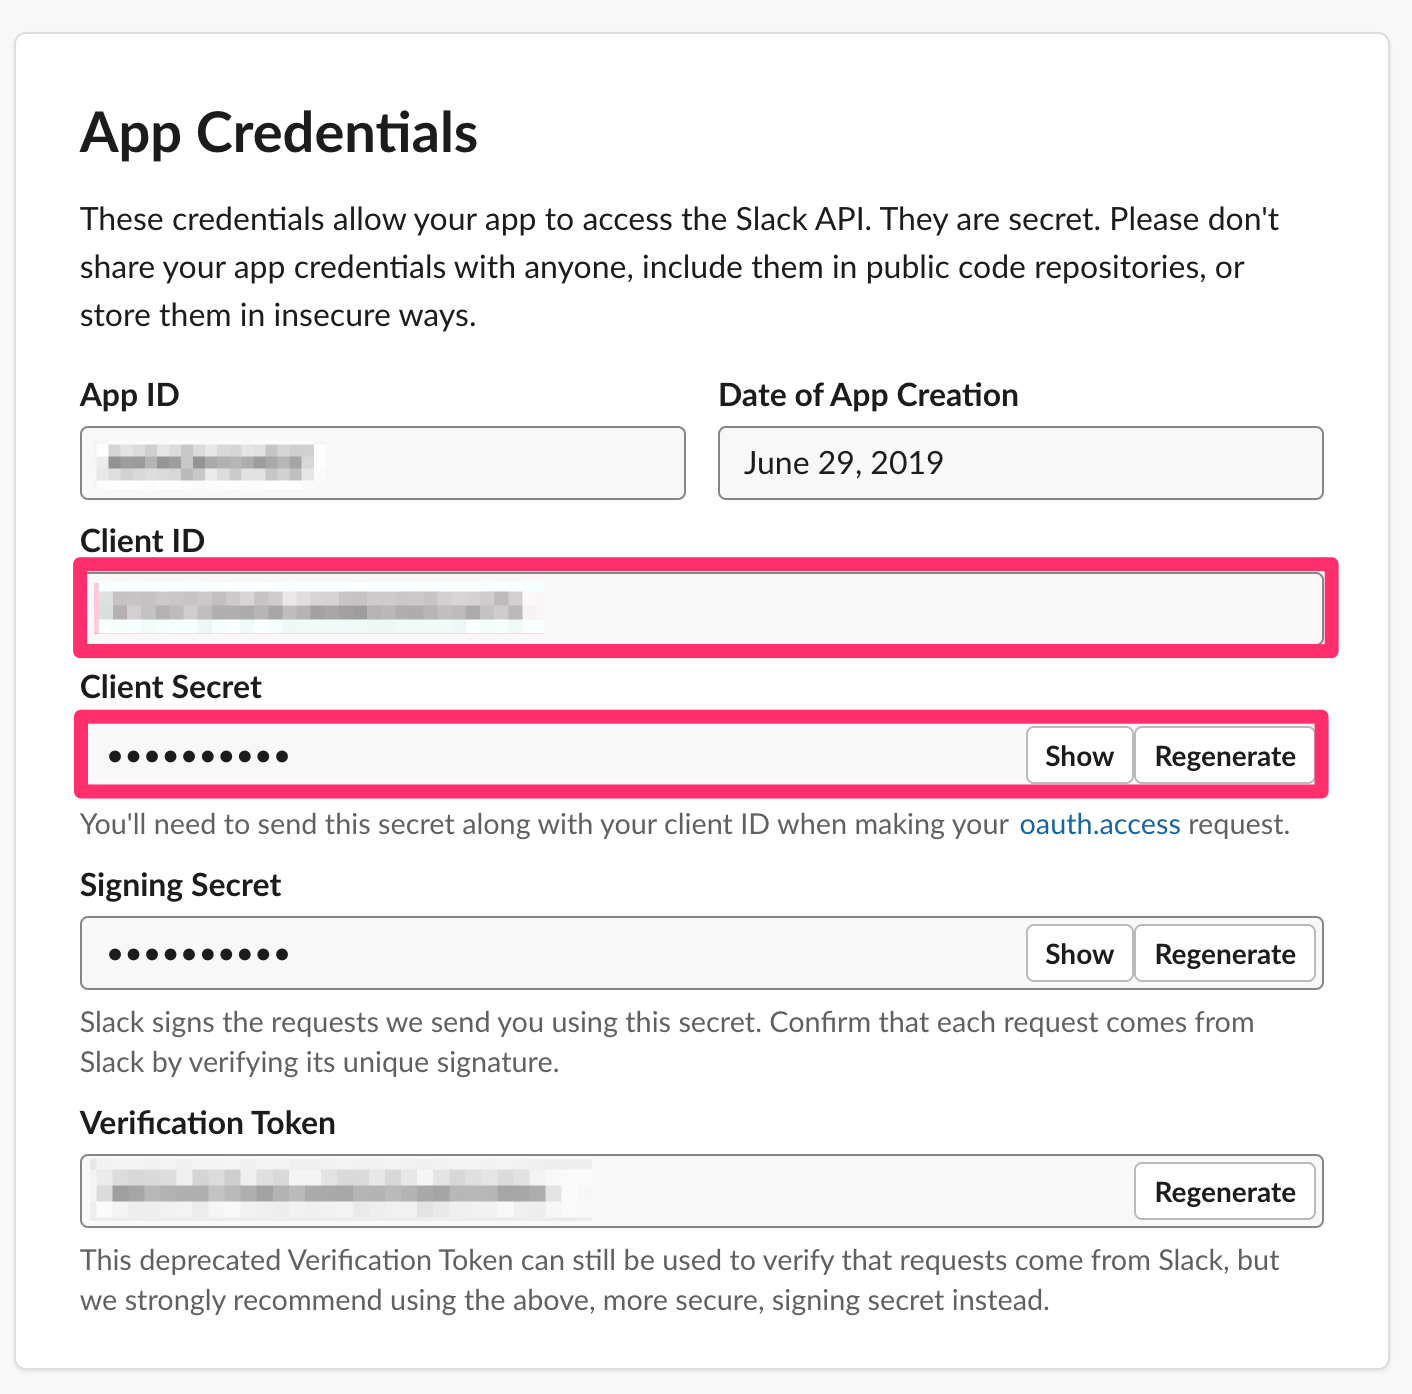
a) Copy paste the value from Client ID into your Raley Notification Slack Client ID field.
b) Click on Show button in Client Secret textbox - you will see the character code that you'll need to copy-paste into your Slack Client Secret field on Raley Notifications screen
4) On the left-hand menu click on Features -> OAuth & Permissions. In Redirect URLs section click on button Add new Redirect URL and paste the following value there:
https://app.raleyapps.comClick on Add button and then on Save URLs button. Your Redirect URLs section should look like this:
5) In your Raley notification configuration screen click on Add To Slack button. In the opening popup you'll be prompted for confirmation to allow Raley Notifications to publish messages to your slack channel(s). Click on Install button. The popup will close and the following message will appear in your Raley configuration confirming that the OAuth was done successfully:

6) Congratulations! Click on Save configuration button in your Messenger and you're done!
NB! You'll need to repeat steps from 4 to 6 (inclusive)
...
